
Are you tired of being limited by the standard registration marks for print and cut projects? Do you want to maximize the use of your sticker paper or cardstock? In this tutorial, I’ll guide you through using the PixScan mat in Silhouette Studio to create full-sheet print and cut projects.
Supplies:
Sticker Paper
Printer
PixScan Mat
Cutting Machine
Step 1: Set Up Your Design in Silhouette Studio
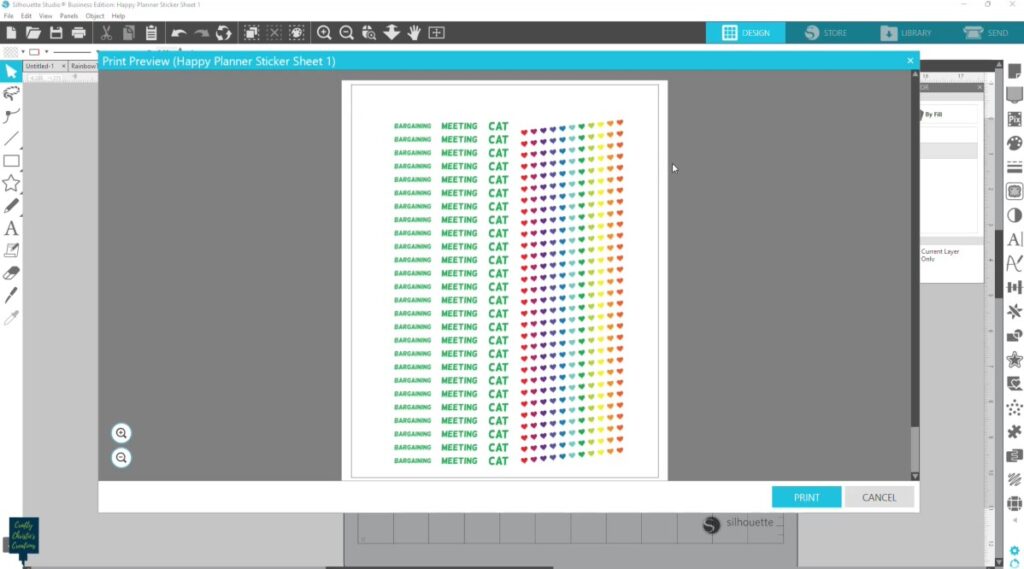
In Silhouette Studio, open your design file. Ensure that your design fits within the printable dimensions. I’m creating stickers for my classic-sized Happy Planner. Make the cutlines red and don’t give them a point value so they won’t print.
Step 2: Print Your Design
With your design ready, print it on your sticker paper. There is no need to use registration marks for this print since the PixScan Mat has built-in markings.
Step 3: Prepare Your PixScan Mat
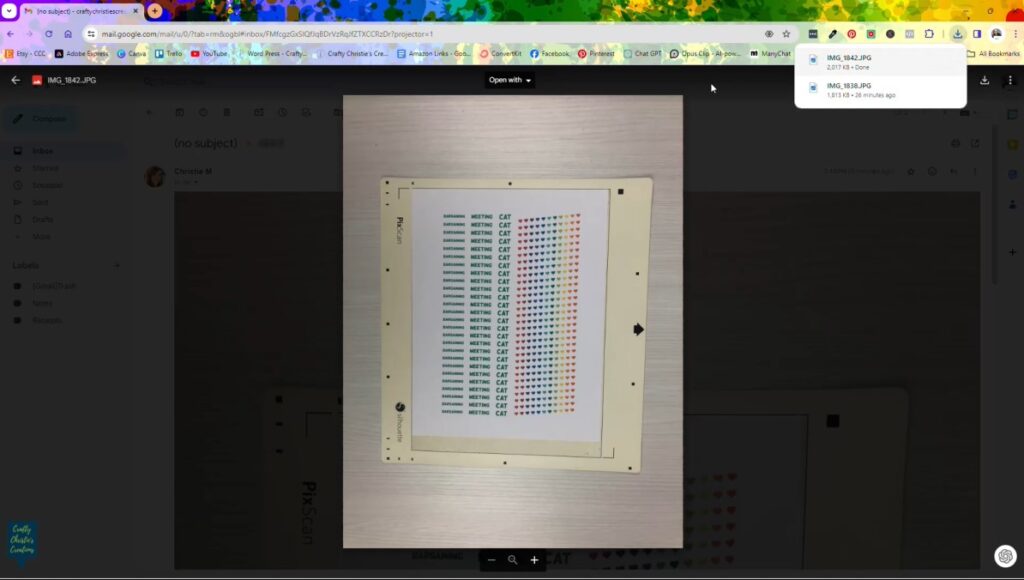
Take your printed sheet and place it onto the PixScan mat. Use your smartphone to snap a photo of the entire PixScan mat with all the registration markings. If your phone is not calibrated with the PixScan follow this tutorial to set it up first.

Step 4: Import Image into Silhouette Studio
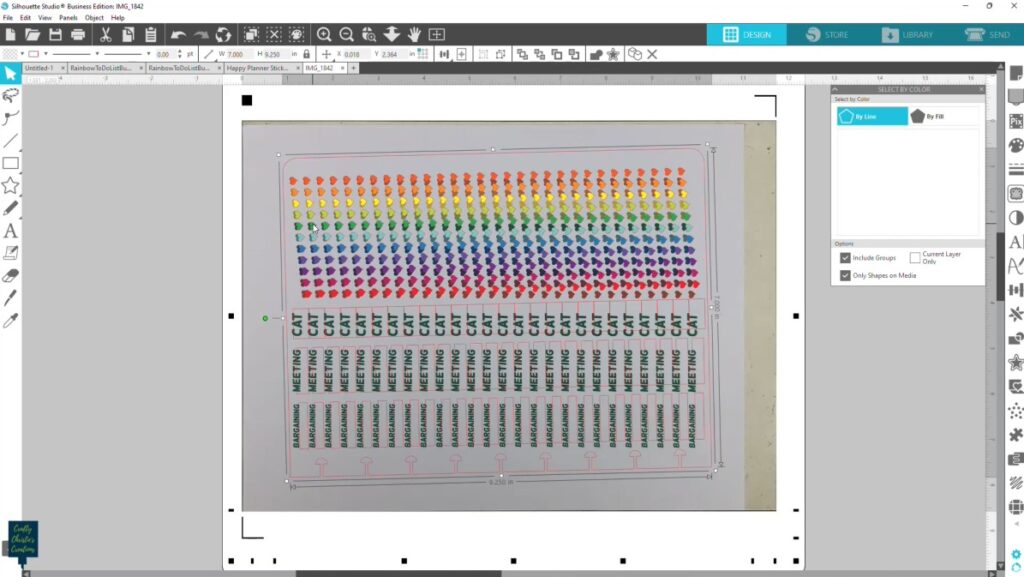
Transfer the photo from your smartphone to your computer. I like to email the photo to myself and download it to my computer. In Silhouette Studio, navigate to the PixScan panel and import the captured image from your file directory. The PixScan photo will open in a new window.
Step 5: Overlay Cut Lines
Copy the cut outlines from the original design file and overlay them onto the Pixscan image. Align the cut lines with the corresponding elements on the printed design.
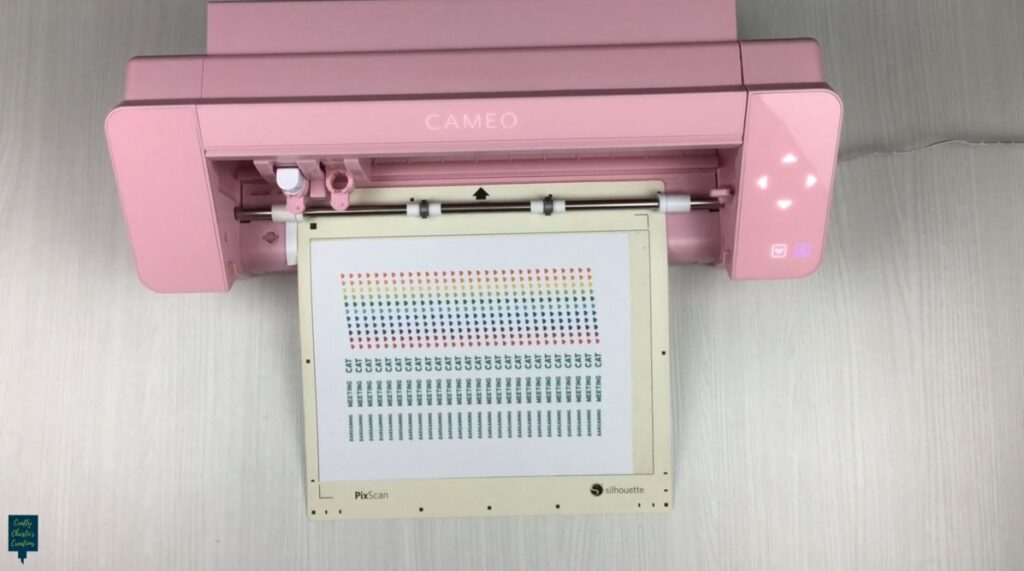
Step 6: Load PixScan Mat into the Silhouette Cameo
Carefully load the PixScan mat into your Silhouette cutting machine, ensuring proper alignment based on the arrows indicated on the mat. Adjust the cut settings for kiss cut stickers.
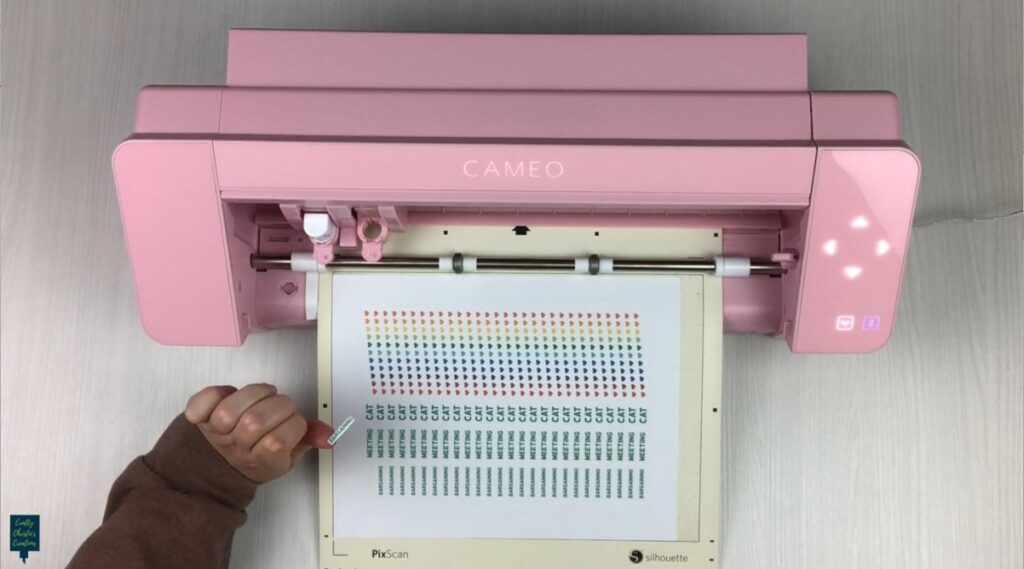
Step 7: Send Design to Cut
Once everything is set up correctly, send your design to cut using the selected settings. Monitor the cutting process to ensure accurate and precise cuts. After cutting is complete, carefully inspect the cut lines to ensure they meet your expectations. Test the kiss-cut stickers by peeling them from the backing to verify ease of removal.
Step 8: Finalize and Enjoy
Once satisfied with the cut quality, unload the PixScan mat from the cutting machine. Your print and cut project is now ready to be used and enjoyed!
By following these steps, you can maximize the efficiency and utilization of your materials when creating print and cut designs with Silhouette Studio. Say goodbye to wasted sticker paper or cardstock and hello to full sheet print and cut projects!


