
Last week we went over how to calibrate a device for the PixScan. Today, we are putting it to work to master Pixscan.
I know the PixScan mat can really boggle some minds. It’s time to shed some more light on the matter.
Step 1: Fill the Mat
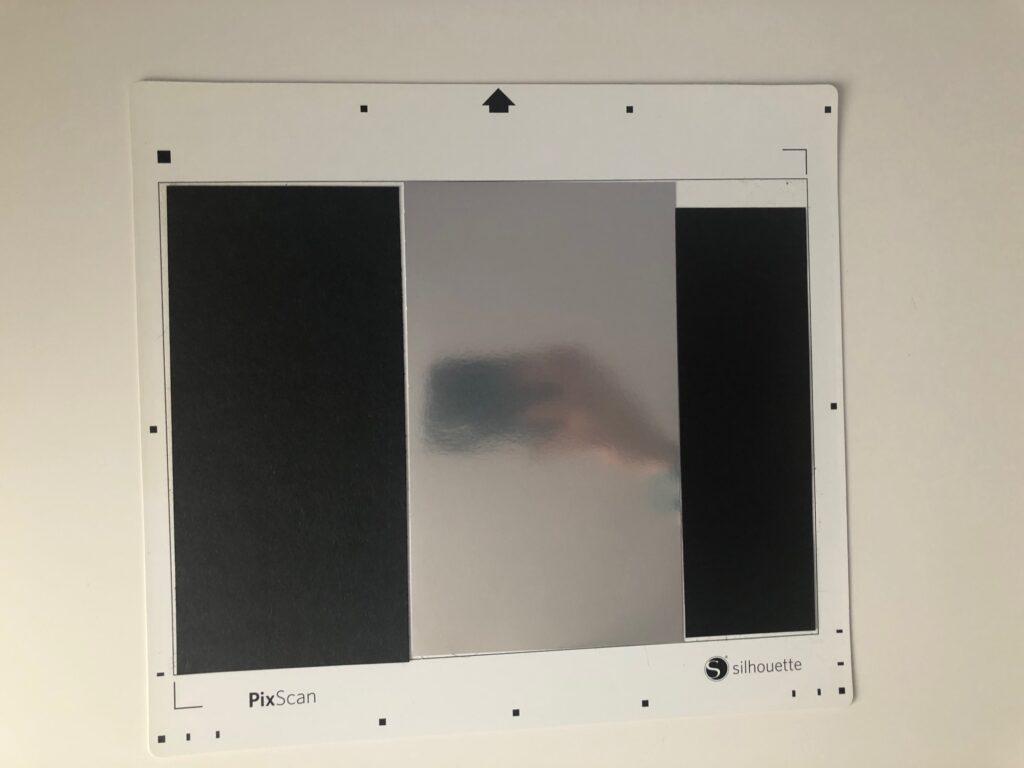
Add your scraps of paper or vinyl to the PixScan mat. Everything needs to stay within the solid black rectangle. Scraps can be any size and as many as you’d like. You see I add 3 scraps, but I only end up using 2 of them. Take a photo of your mat with your calibrated device. Be sure the entire mat is showing in the photo since the registration marks are on the outside of the sticky area. I use my iPhone to take the photo then email it to myself. Then I download the photo to my computer.
Step 2: Load Image into Silhouette Studio
In Silhouette Studio, click the PixScan icon on the right sidebar. The PixScan panel will appear. Click “Import PixScan image from file.” Navigate to where you saved your image and click open.
Step 3: Add Designs
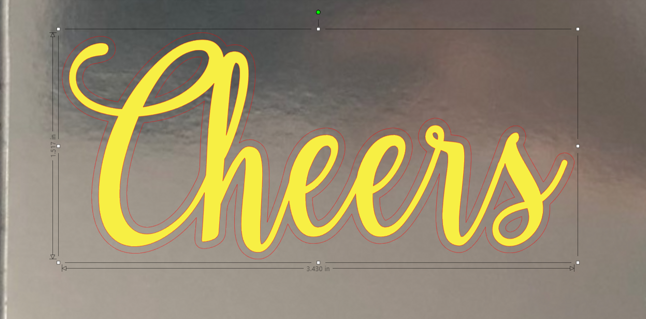
Your image will load into Silhouette Studio. Now you can add designs onto the scraps. Size your designs to fix and if there are gaps between your scraps don’t put images there. If you have your design saved in the library you can use the button on the left sidebar. Double-tap the design and it will open on your current page.
If like me, your designs are saved to your hard drive they will open in a new tab. Copy and paste the design onto the PixScan image. I’m using my champagne glasses svg and I’m typing out the word “cheers” in the font sofontsy. I’m adding an offset to cut a larger version in silver and the original in black. My plan is to layer these on a card (I’ll be showing you this next week).
Step 4: Cut it out
Once everything looks good head over to the send panel. Check your cut settings, I’ll be checking the overcut to make it easier for these intricate letters. If you need to do a test cut use the arrows and the “test” button to do that before you send it to your machine. When you’re confident everything looks correct, hit the blue “send” button and you’re off to the races!
Loading the PixScan mat: be sure to load the mat with the arrow pointing into the machine. The built-in registrations marks need to read in the correct order. Once you hit send your machine will automatically start reading the registration marks and then start cutting.
That’s it folks! You have successfully used the PixScan mat! Now you can walk away feeling like a master!
Here’s the video with a more detailed look at the process.


