
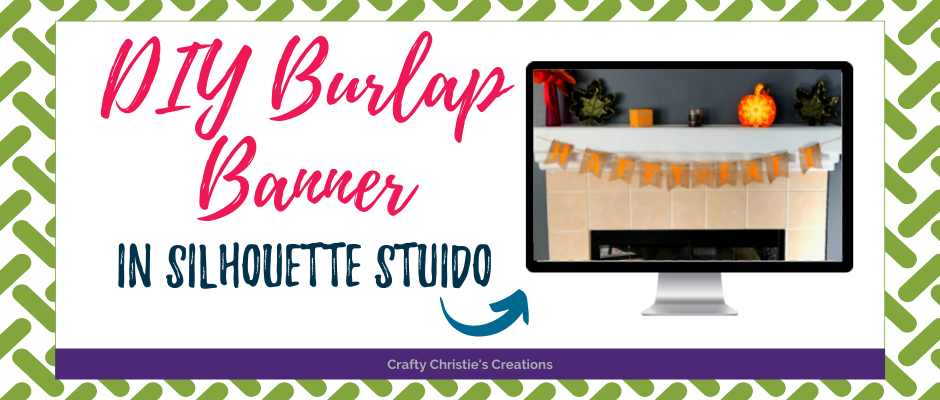
Banners are such an easy way to add extra cheer to any space. I especially like draping them over the fireplace. As I started decorating my mantel for fall, I realized I needed a little something extra and a banner was just the ticket. So today I’m showing you, start to finish, how to create a DIY burlap banner in Silhouette Studio.
Supplies:
Burlap
Heat Transfer Vinyl – Dandelion color by Joann
Sharpie Marker
Scissors
Twine or Jute
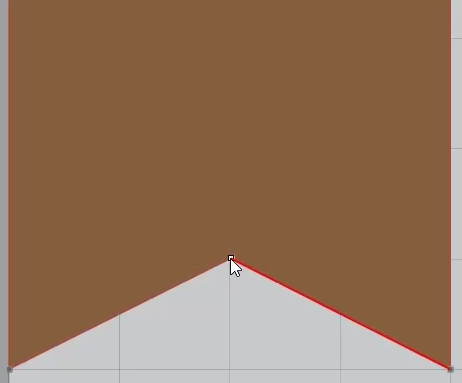
Step 1: Create the Banner Flag
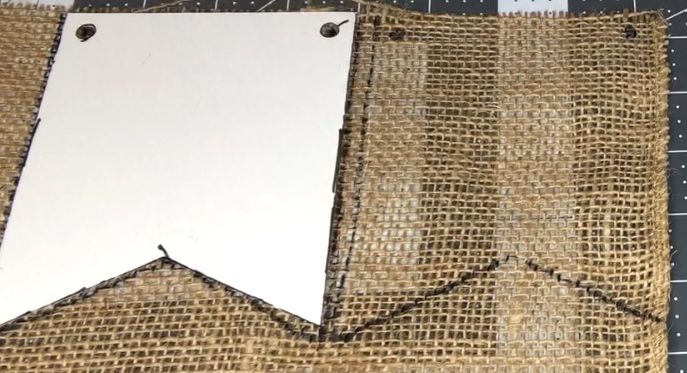
Make a rectangle that measures 4 inches wide by 5 inches tall. Use point editing to add an extra point in the middle at the bottom of your rectangle. Drag that point up 1 inch to make the pointed flag parts to the bottom of the banner.
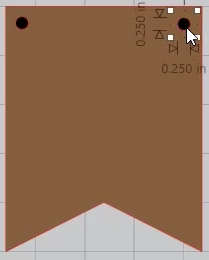
Step 2: Add the holes
Use the ellipse tool to make a .25 inch circle and place one on each side near the top of the banner. Be sure to leave enough room around the edges so the banner won’t fall apart. I’m using this banner to cut a template out of heavy-weight cardstock. I find my Silhouette Cameo has a hard time cutting the burlap.
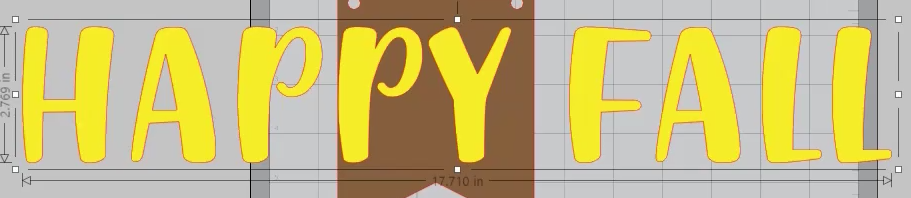
Step 3: Add Text
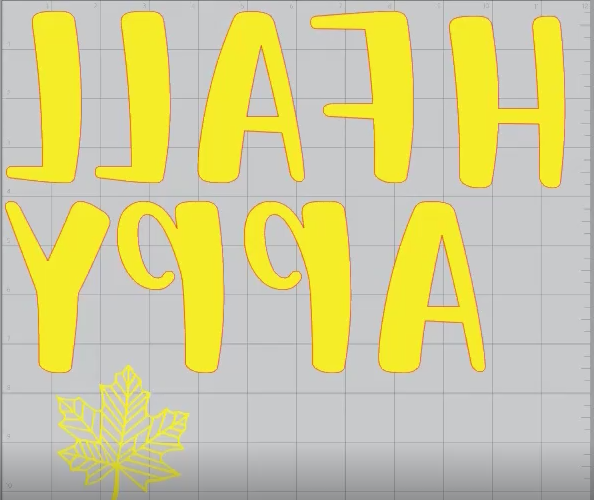
I’m doing mine for fall so I type out “Happy Fall” in Mr. Rabbit font and I add one of my Leaf SVG designs. To make sure each letter is the same size, select the text and make it a compound path. With the ratio aspect locked, resize your letters to 3.5 inches tall.
Because the letters will be cut on heat transfer vinyl (htv), the text needs to be mirrored. I’m cutting on a 12 x 12 inch piece of htv so I have to manipulate my letters to fit. Select the text and release the compound path. Rubber band select the letters that will fit across one row and make that a compound path. This will remove the inside pieces of the letters “A” and “P”. Continue doing this until all the letters fit inside the piece of vinyl. Make sure to leave enough space on all sides of your vinyl, my “L” and “A” got a little cut off even though they were within the cut boundary (I think I’m due to recalibrate my machine).
Place the htv with the clear liner facing down. This usually means the color side will be on the mat. Do a test cut if needed, and then cut out and weed the design.
Step 4: Cut the Burlap
Cut the banner on thick cardstock and use a Sharpie marker to trace out the banner on the burlap. Repeat this step until you have enough banner flags for each letter and graphic. Don’t forget to mark the holes too.
Cut the burlap to make the banner flags. I use a rotary cutter and a ruler to cut along the inside of the marker lines so I don’t have any Sharpie showing on my banner. If you’re good at cutting straight lines, a regular pair of scissors will do the trick. I can’t cut a straight line to save my life which is why I use a straight edge when I cut.

Step 5: Add the HTV
Use the directions for your htv. Mine says to preheat the material and then apply the htv using an iron applying medium pressure for 30-40 seconds on the front and then repeat on the back. I used this method for all 10 flags.
Step 6: String the Banner
Add the string to the holes. I’m having some difficulty because my burlap is fraying pretty well and it was loosely threaded to being with. I use a small screwdriver to help open up the hole under the Sharpie marker and thread my twine through it. I like to thread front to back so the string runs along the backside of the banner. This is just a personal preference.
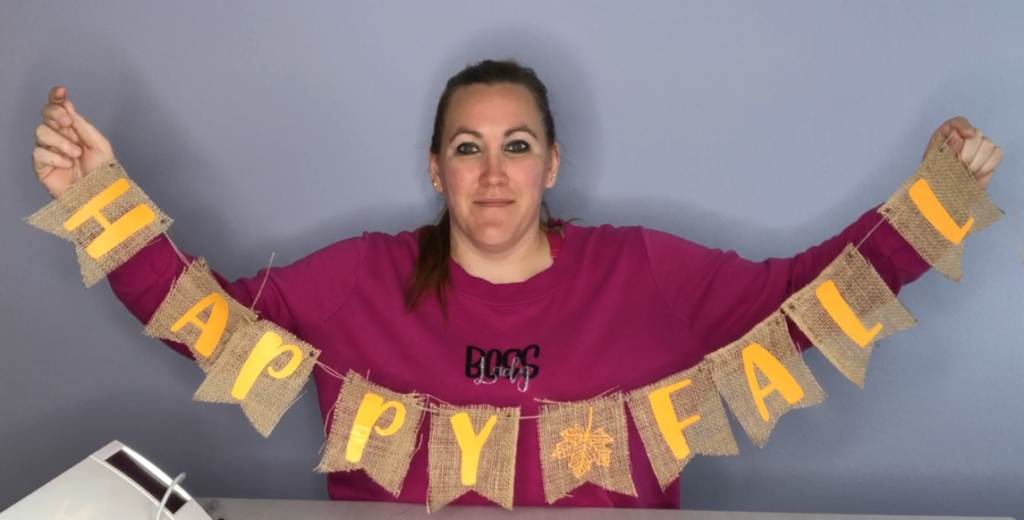
All that is left to do now is hang up your banner. I use masking tape to adhere the string to the sides of my mantel. You can also use command hooks or push pins as well.

Check out the video below for more details on making this DIY burlap banner.


