
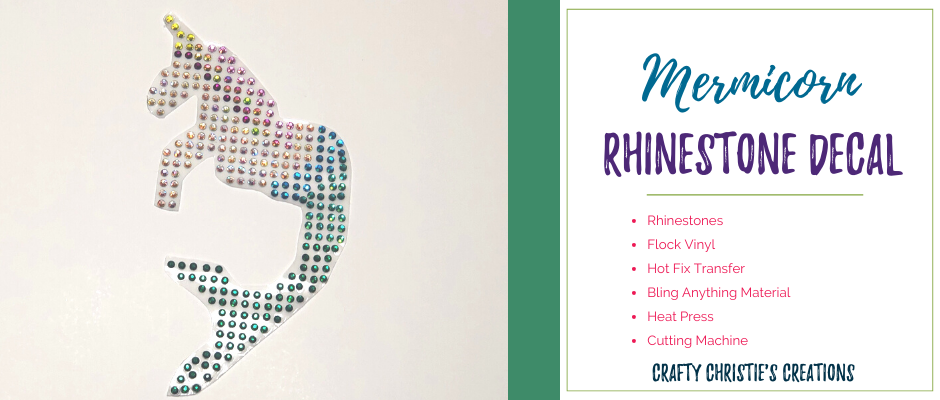
Rhinestones aren’t just for clothing anymore! You can take those hotfix rhinestones and turn them into a decal that can stick to any hard surface. Follow along as I make a mermicorn DIY rhinestone decal.
Supplies:
Step 1: Cutting the template
Either purchase a rhinestone template svg or make your own in Silhouette Studio. You will need Designer’s Edition or higher to have access to the rhinestone panel. Check out this blog post where I go over how to make a rhinestone template in Silhouette Studio.
Draw a box around the design. Copy this box to each layer to become the “registration mark” for the design. Cut each layer of the stencil out of the magic flock vinyl.
Take the white backing off the flock and stick it directly to the mat. To cut the magic flock, I used my rachet blade of 10, force 33, speed 2, and 2 passes.
Step 2: Brush in the rhinestones
I’m using 10ss (3mm) hotfix rhinestones in rainbow, dark pink, fuchsia, zircon, indicolite, emerald, yellow, and crystalAB. The rhinestones have glue on the back that is heat activated. If you plan on using rhinestones for clothing this is what you want. There are lots of different sizes of rhinestones so depending on the look you want you can get larger or smaller hotfix stones.
Apply your template to a smooth, flat surface like a tabletop or craft mat. This is super important so the rhinestones can easily fall into the holes in the template.
Pour out a small mound of stones and use some sort of sponge or squeegee to brush the stones over the openings. The stones should fall right in, I was able to use a pair of tweezers to fill in any remaining holes.
To get all the extra stones cleared away, I swept them into a funnel and put them back in the bag. This made it much easier to clean up and I wasn’t getting stones stuck all over the transfer sheet.
Step 3: Make your transfer
Using the hotfix transfer film, cut an area larger than your template so you can hinge the transfer over the layers without missing a beat.
You only get 1 shot at pulling up the stones. Use parchment paper to protect your design until you are ready to lift them with the transfer sheet. This really helped me make sure the layers were spot on before using the transfer film.
Add your next layer on top, brush in the stones, and use the transfer to pull them up. Repeat this process for all the layers before moving on.
Step 4: Add the Bling Anything material
Apply the design to the bling anything material with the shiny side facing up. Now melt the rhinestones into the bling anything material. At first, I wrapped my decal in parchment paper – I don’t recommend it! The parchment paper pretty well melted onto the transfer sheet. I used my Easy Press at 300 degrees Fahrenheit for 15 seconds. To know if more heat is needed look to see if there is a halo of glue around each rhinestone.
I did a second dose of heat for another 15 seconds, this time I wrapped my design in my ironing cloth. This time I could tell the glue was melted. Peel the transfer sheet off the front to expose the rhinestones.
I fussy cut around the edges of the bling anything material. If you’d rather get an even border, cut it on your silhouette. Add an offset to your design and cut the offset shape from the bling anything material.
Step 5: Show off your bling
Pell the backing off your decal and stick it onto a hard surface for the world to see.
I haven’t found a different brand than the bling anything material to make these decals. If you have other suggestions for materials, please let me know!
Check out the video below for more details.


