
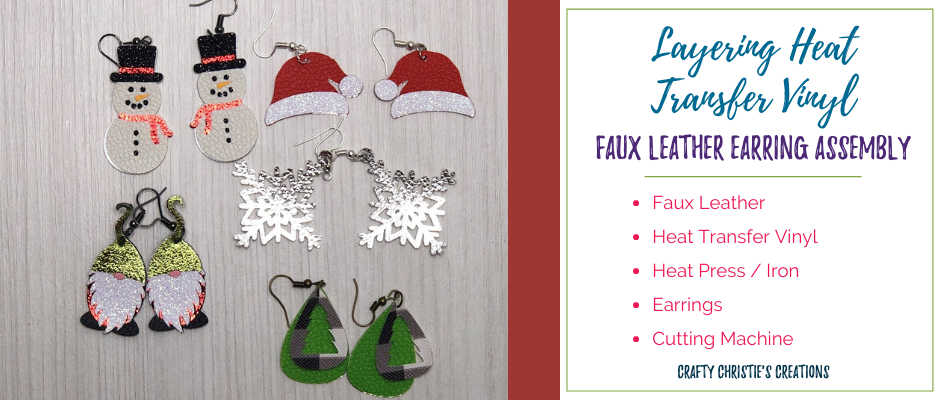
Have you ever tried making your own faux leather earrings? This has been a project I’ve wanted to try for a while. With Christmas almost here, I figured these would be great little gifts for my girlfriends.
I took full advantage of JoAnn’s Black Friday deals and stocked up on lots of glitter and foil heat transfer vinyl with this project in mind.
In this tutorial not only will you learn how to make these earrings, but you’ll also learn the correct way to layer heat transfer vinyl. I’ll be sharing some tips on what to look for when buying SVG files you plan to use with htv.
Supplies:
Faux Leather ( I use a kit that came with the earrings and jump rings)
Heat Transfer Vinyl ( I use a combination of Cricut and Siser)
Earrings and Jump Rings
Step 1: Find the correct SVG file
Not all earring files are made to layer with heat transfer vinyl. Look for files that have each layer overlapping. Heat transfer vinyl is known to shrink so puzzle piecing layers together will not always turn out correctly. You’ll notice when I make the gnome each layer encompasses the entire design area that the layer on top will also cover. This is to prevent having gaps that will show the base leather.
Step 2: Cut out the faux leather
I use the base shape of each design to cut from the faux leather. On the Silhouette Cameo 2, I use my fabric ratchet blade (This is no different than the normal ratchet blade other than the color. It is blue to help limit the use of it for fabric.) on the leatherette setting. I make sure my mat is extra sticky to hold down the leather and I place the leather fabric side up. Since I am cutting a left and a right earring, there is no need to mirror the designs.
Step 3: Cut the heat transfer vinyl
I use a mixture of glitter and foil htv. I cut a copy of each layer I need for the left and right earrings. I also cut a copy of the base shape of each design from foil htv to place on the back of each faux leather piece. This makes the leather a bit more sturdy and also gives the earrings a more professionally finished look. Again, since my file already has left and right earrings, there is no need to mirror the layers.
Step 4: Apply the htv to the leather
I use my Cricut Easy Press set at 275 degrees Fahrenheit for 30 seconds. I preheat my leather for 30 seconds then apply the first layer of htv on the front. Carefully I peel back the carrier sheet to check that the vinyl adheres to the leather. If needed I flip the leather over and apply another 30 seconds of heat to the back. Then it is time for the next layer. I take my time getting each layer lined up properly, then cover it with my pressing cloth and apply 30 seconds of heat at a time. The glitter htv does require more time than the foil so I keep checking that the carrier sheet comes off cleanly.
Step 5: Add the jump rings and earrings
I use a set of pliers to open the jump ring. I slide the jump ring through the hole in the leather and add the earring as well. Then I close up the jump ring. The kit I’m using came with a set of pliers, but it might be helpful to have another one to open and close the jump ring. I can also use the pliers to turn the earring hook in the correct direction so the earrings fall with the decorated side facing out.
It takes me about 2 hours to make 5 pairs of earrings. I do all my cutting first then do all my pressing and then earring hooking. Though this process is time-consuming, I think it is worth the effort. The earrings look very professional and I know my girlfriends will love them.
Check out the video below for more details on how I put these earrings together.


