
Being a new year, one of my goals is always to get healthy and shed a few pounds. If you’re anything like me, that motivation is fleeting.
I lasted a full 24 hours of cleaner eating habits when my boss brought in some of my favorite pastries from Joe’s Donuts, a local hot spot with to-die-for donuts. My willpower is nonexistent against these tasty treats!
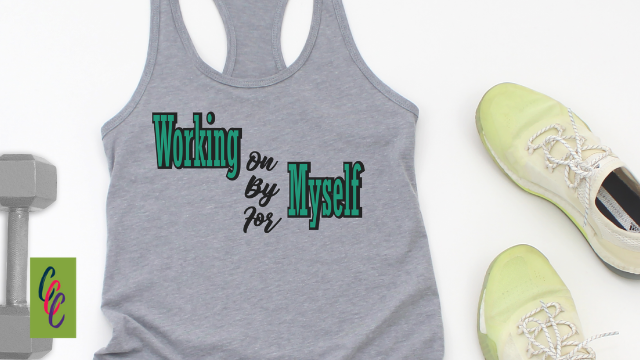
Feeling a bit discouraged, I decided I needed some more motivation to keep my willpower stronger than my desire to eat donuts. What better way to stay motivated than having a cute new workout outfit?
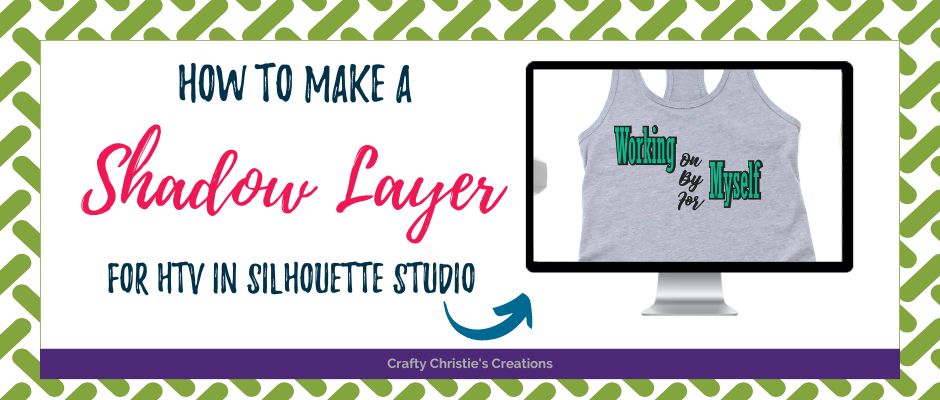
Instead of breaking the bank, I headed to my local Dollar Tree to grab a shirt and apply one of my workout SVG files. The design looked a little plain on my gray tank, so I added a shadow layer to give it some dimension.
Supplies:
Gray Tank Top
Working on Myself SVG
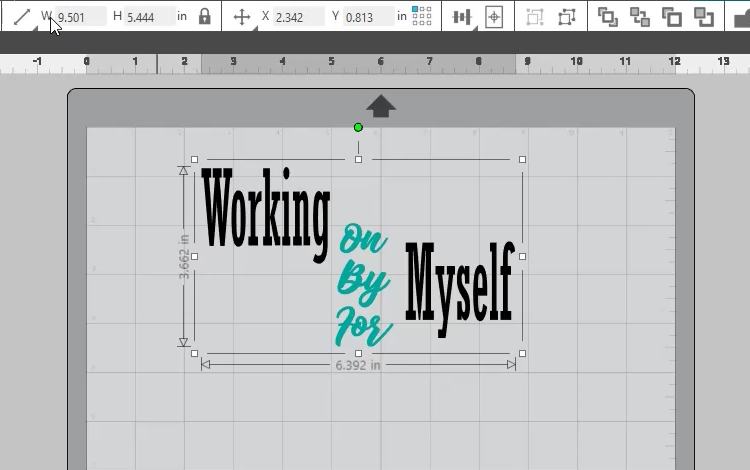
Step 1: Resize the Design
Rubberband select the entire design and group it together. Turn on the ratio aspect lock and then resize the design to 9.5 inches wide for an adult shirt.
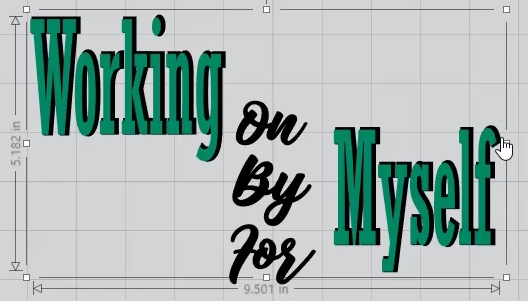
Step 2: Make the Shadow
Change the color of the words “working” and “myself” to teal and the words “on,” “by,” and “for” to black. Now make a copy (Ctrl + C) of the words ” working” and “myself” and paste it in place (Ctrl + F). Change the color to black and add a black 5 point line color or stroke to these words. Now send them to the back. With the black “working” and “myself” still selected hit the right arrow key to move this layer to the right. This gives the shadow effect. Keep hitting the right arrow key until you have the shadow where you want it.
Step 3: Release the Compound Paths
Now select the teal words “working” and “myself” and release the compound path for the design by right-clicking and choosing “Release Compound Path.” This will fill in the openings of the “O”, “G”, and “E.”
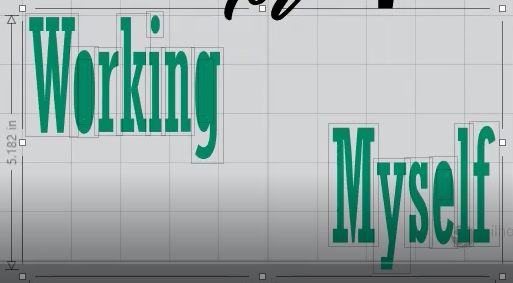
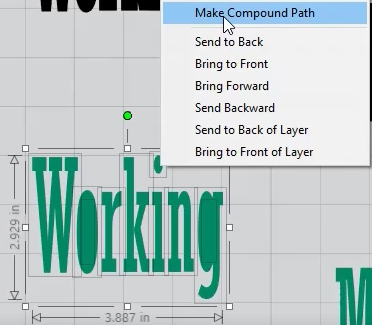
Step 4: Make each word its own compound path
Select the letters for the word “working” then right-click and select “Make Compound Path.” This will remove the fillings in the letters. Do the same for the word “Myself.”
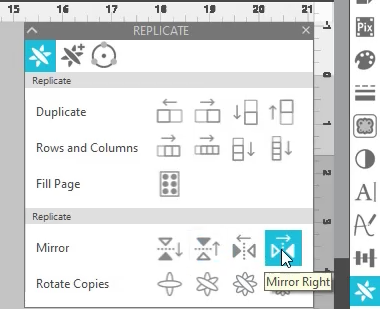
Step 5: Mirror the Design
Now that the design is to your liking, don’t forget to mirror it for htv. With everything selected, open the replicate panel and mirror to the right. Delete the unmirrored design, you don’t need this anymore.
Step 6: Cut the Design
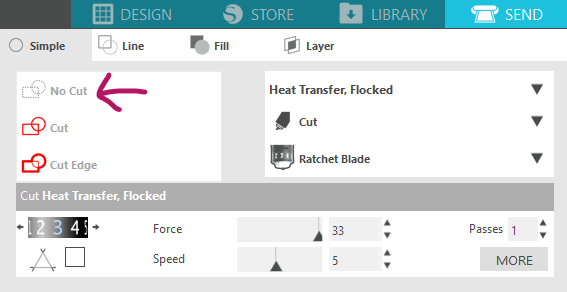
Since this is a smaller design I was able to cut both colors of htv at the same time. With the transparency down on my screen, I could see where the vinyl needed to be placed to cut both pieces. I used HTV flocked setting to cut this vinyl. I use this setting for the Unuast brand and did not do a test cut with the Siser Easy Weed. I ended up cutting through the carrier sheet of the Siser htv.
A word of advice – if you are using 2 different types of htv, cut one at a time so you can adjust your cut settings. You can do this by selecting the part of the design you don’t want to cut and clicking “No Cut” on your send panel. Once that is finished cutting select the other piece as “No Cut” and adjust the cut settings as needed.
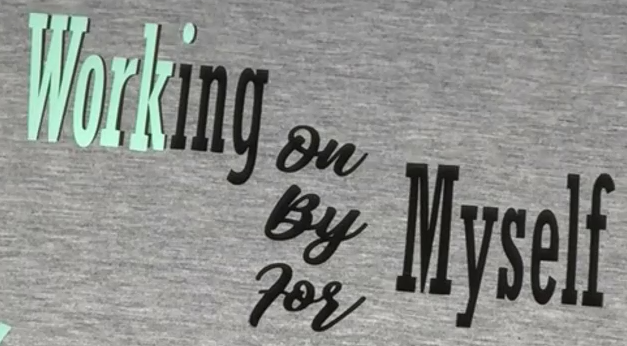
Step 7: Apply Design to Tank Top
Lint roll and pre-heat the shirt for 15 seconds. Measuring down 3 inches from the collar, place the design centered on the shirt. Place the black layer down first. I used my Cricut Easy Press 2 at 320 degrees for 15 seconds and it worked wonderfully for both brands of htv. Both brands call for a warm peel of the carrier sheet.
For the mint layer, I had a harder time since I cut through the carrier sheet. I quickly learned to apply letters at an offset while the black vinyl was still warm. This helped hold the mint vinyl in place. Occasionally I had to reheat the shirt before applying more of the mint letters. Again this only happened because I didn’t do a test cut for the Siser vinyl and used the wrong cut settings.
Step 8: Get in a Workout!
Wait 24-48 hours before washing and wearing your new shirt. I guarantee fun new workout shirts will have you gunning to get that next sweat session on the books.
Check out the video below for the full tutorial.


