

Split word monograms make excellent personalized gifts. I’m going to show you how easy they are to make from scratch in Silhouette Studio. This is a great beginner item and can be made in any edition of Silhouette Studio.
Start off by selecting the text tool and typing out the words you want to use. I’m doing “World’s Greatest Dad.” Now for the part that can take forever… choosing the fonts. I’m using Noermala Script for the word “dad” and Space Dream for the words “world’s” and “best.”
Next, I color my words and resize how I want. Typically, the words written across the monogram should be the same width or a bit longer. Place the words across the monogram where you want them. I usually start with them centered and work from there.
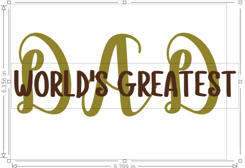
Now using the rectangle tool, add a rectangle around the words “world’s greatest.” This box will represent the “split” area that will be taken out of the word dad. Center the box around the words. I find I get a better result when I make the words a compound path. You can do this by right-clicking and then choosing make compound path.

Now make a copy of the rectangle by holding down the alt or option key on a mac computer and click and drag the rectangle. (fill out the form below to grab my free keyboard shortcuts list)
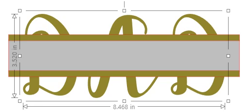
Make the height of this rectangle to be 0.25 inches. Slightly overlap this rectangle on top with the one around the words. Make a copy of the skinny rectangle and place it slightly overlapping on the bottom of the larger rectangle. These skinny rectangles will define the split.

To better see what happens in the next steps color all the rectangles. Now you can see that it is difficult to read the word dad. Using the arrow keys, I move the word dad up until it is more legible.
Once everything is in place, select the small rectangle, in my case it’s gray, and the monogram word. With both selected open the modify panel and hit subtract. This cuts the gray box out of the word dad. The open area is where the words “world’s greatest” will fit.
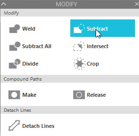
All that is left to do now is weld the rectangle strips to their corresponding letter parts.

For the complete tutorial check out the video below!


