
How many times have you loaded your material into your Silhouette and hit the send button to find that your masterpiece is all but glorious? I’m totally guilty of this too. After wasting too many sheets of vinyl and cardstock, I finally decided it was time to dig into making test cuts.
In this tutorial, I’m walking you through how to perform a test cut and also what to do if the test isn’t a clean cut.
When setting up your page, place your design towards the top of the page. Be sure to leave room at the bottom for doing the test cuts. Once you have your design all set up head over to the send page.
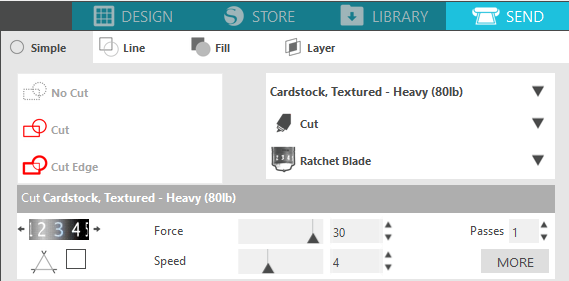
Choose the cut settings you think will work best for your material. In this example, I’m using Recollections Cardstock 65lb. I like using the setting called ” Cardstock Textured – 80lb” for this paper when using my ratchet blade.
When you choose the cut setting, it will automatically tell you the blade depth, speed, force, and how many passes it will take to cut.
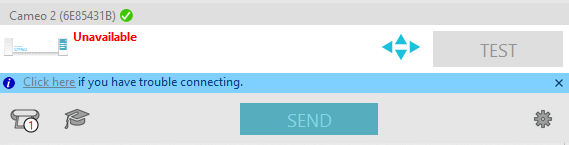
To test this setting, use the arrows towards the bottom of the send panel to feed the mat towards the bottom. Once you have the spot you want to cut, hit the button that reads “Test.” The cutting machine will then cut out a square and a triangle as the test.
Using the lower section of the cutting mat, allows you to peel up the cut material without having to unload your mat after each test cut.
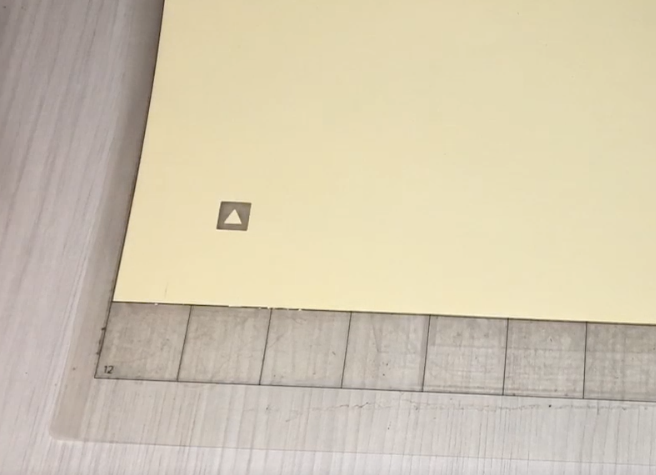
How do you know if you’ve got the right settings? The square should easily pull away from the mat leaving crisp lines. If you notice the cut did not go through the material, you may need to adjust depth of the blade, the force or try another pass.
If you have ragged edges, you may need to adjust the speed or try the overcut button.
Choose one of these settings to change and then try another test cut using the arrows on your send panel. Continue this process until you get crisp cut lines and the square removes easily.
Once the square removes easily, you know you have the correct cut settings for that material. Unfortunately, there is no secret formula to getting the correct settings on the first try. It really is trial and error.
To save you time when you use that material again, print the Silhouette Cut Setting Tracker to keep track of your cut settings for all your materials. Grab your copy of the Silhouette Cut Setting Tracker below. I’ve been using this tracker for years and it has saved me tons of time guessing at cut settings when I pull out material I haven’t used in a while.
Here is the full video showing how to do a test cut.


