
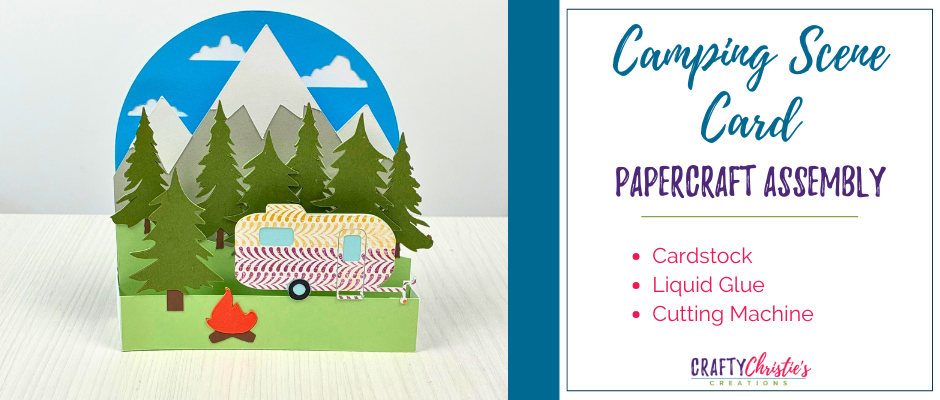
You know that feeling when you make something so adorable that you can’t stop staring at it? That’s exactly what happens with this pop-up camping card! I’ve been on a box card kick lately (they’re just too fun), and this summery scene with its cute little camper and pine trees is giving me all the outdoor vibes without the mosquito bites!
Why You’ll Love This Camping Scene Pop-Up Card
Let me just say, if you’ve been intimidated by pop-up cards before, this one will change your mind! It’s *surprisingly* simple to put together, takes about an hour start-to-finish, and creates such a “WOW” reaction when someone opens it. Plus, it folds flat for mailing in a standard A9 envelope (that’s 5¾ × 8¾ for my measurement-challenged friends – don’t worry, I’m one of you!)
The best part? When your recipient is done admiring it, they can stand it up on display as a little piece of summer crafty goodness on their desk or shelf. Talk about a card that keeps on giving!
What You’ll Need
Camping Scene Card Template
Cardstock Pack
Liquid Glue
Cameo 5 Cutting Machine
Electrostatic Mat
The Magic is in the Layers
This camping scene comes to life through layers – four of them to be exact! Here’s how the assembly works:
Layer 1: Campfire & First Tree
The front layer features that cute little campfire spot and a tree with a thicker trunk than the others (that’s how you know it goes here!). This forms the foundation of our scene, and you’ll want to make sure everything lines up perfectly at the top.
Crafty Tip: I used patterned paper for my camper this time, and wow, what a difference! Sometimes those little tweaks make a project feel completely custom. Just be mindful of which way your pattern runs – horizontal or vertical!
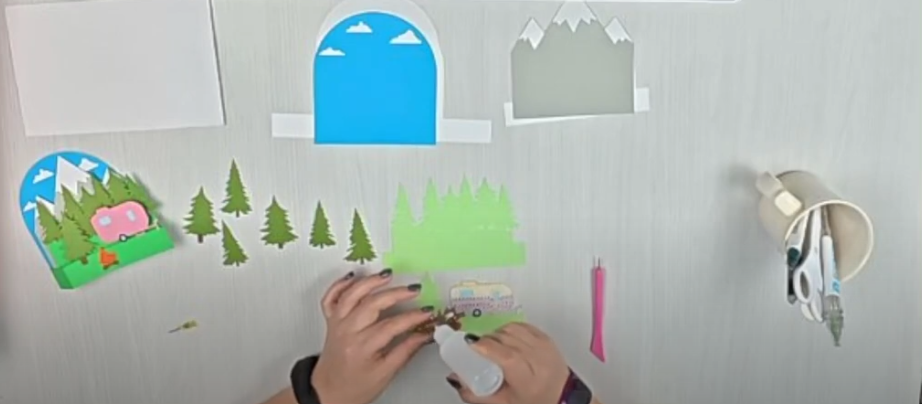
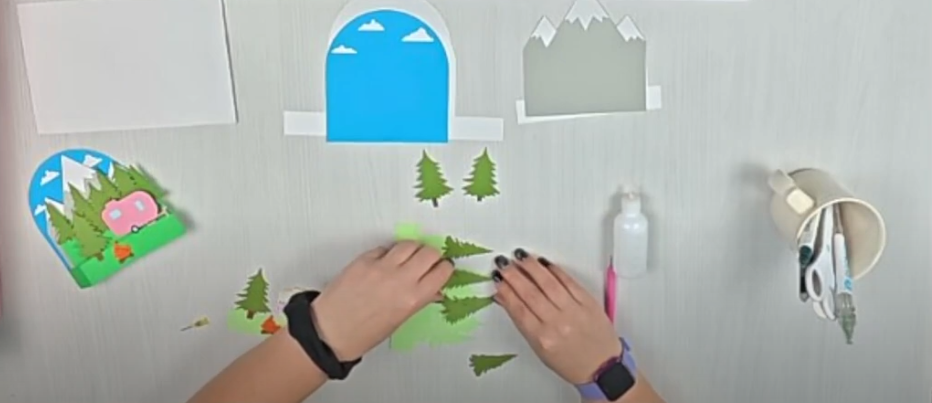
Layer 2: More Trees & Dimension
For the second layer, we add additional trees. Here’s where you can get creative with dimension! Try placing glue just down the center of your tree cutouts and letting the edges curl up slightly for that 3D effect. Of course, if you’re planning to mail this card, you might want to skip that extra curl – nobody wants a squished forest arriving in the mail.
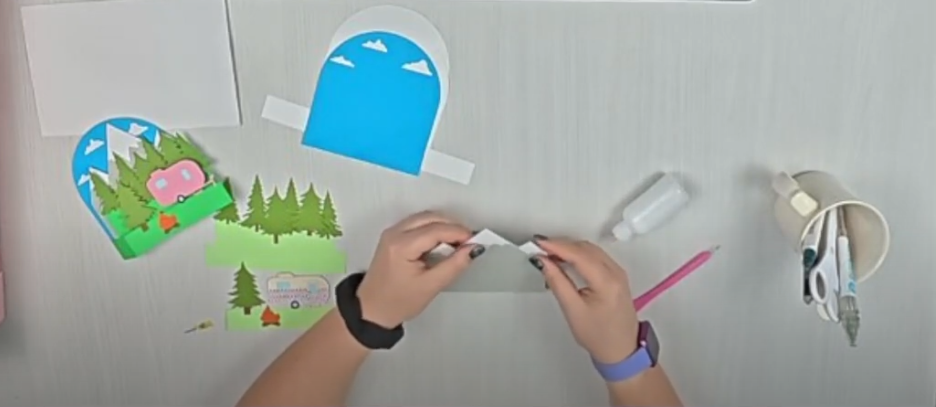
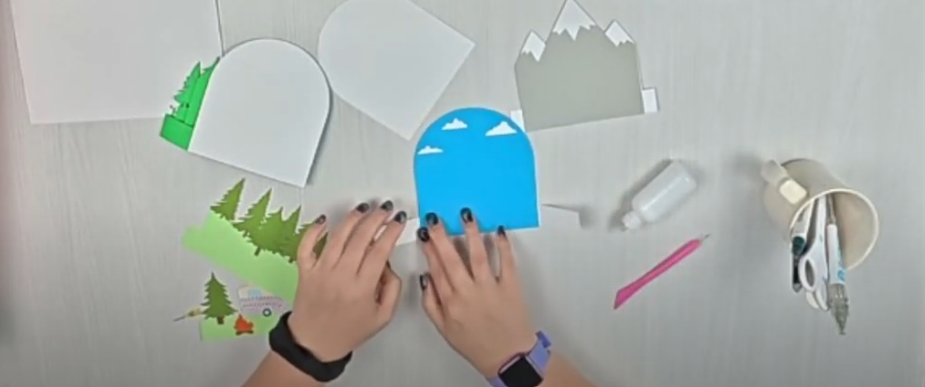
Layer 3: Mountains with Snowy Caps
The third layer brings in those beautiful mountains with their paper-pieced snowy caps. When positioning the peaks, I find it easiest to lay them on the mountains before gluing. I’ve put the wrong peak on the wrong mountain before and it doesn’t work out so well.
Little Secret: I didn’t cut all my card bases out of the same color. By cutting the bases out of different colors I was able to save a few layers in my paper piecing process.
Layer 4: Sky with Clouds
The back layer adds that dreamy sky with clouds cutting through. This is where my little timesaver comes in – if you cut your base out of white (like I did), you don’t need to add another piece to the back for writing your message! One less step, and who doesn’t love that?
Assembling Your Camping Scene Pop-Up Box
Here comes the fun part – turning those flat layers into a 3D masterpiece! The trick is working backwards:
- Start with the mountain layer, bending the score lines back and attaching it to your back panel side walls.
- Add the tree layer next, making sure everything lines up perfectly at the bottom.
- Connect the sides by adding glue to those perfectly positioned tabs.
- Finally, add the front layer, lining everything up flush with the bottom.
Give everything a good press and check that your card stands nicely and folds flat. Sometimes I like to gently bend it in both directions to make sure it works smoothly for the recipient.
The Finished Pop-Up Camping Scene Card
When you’re done, you’ll have this absolutely adorable summer scene that’s ready to brighten someone’s day! Tuck it into an A9 envelope, and it’s ready for mailing. When they pull it out and stand it up – instant smiles!
Want to See It in Action?
As much as I love chatting about this project with you, sometimes you just need to see it being made! Check out my step-by-step video tutorial below to watch me put this entire card together. It’s so much easier to follow along visually, especially for those tricky fold and assembly steps!
Your Turn!
I’d absolutely LOVE to see your version of this camping card! Are you going with solid colors or patterned paper? The possibilities are endless!


