
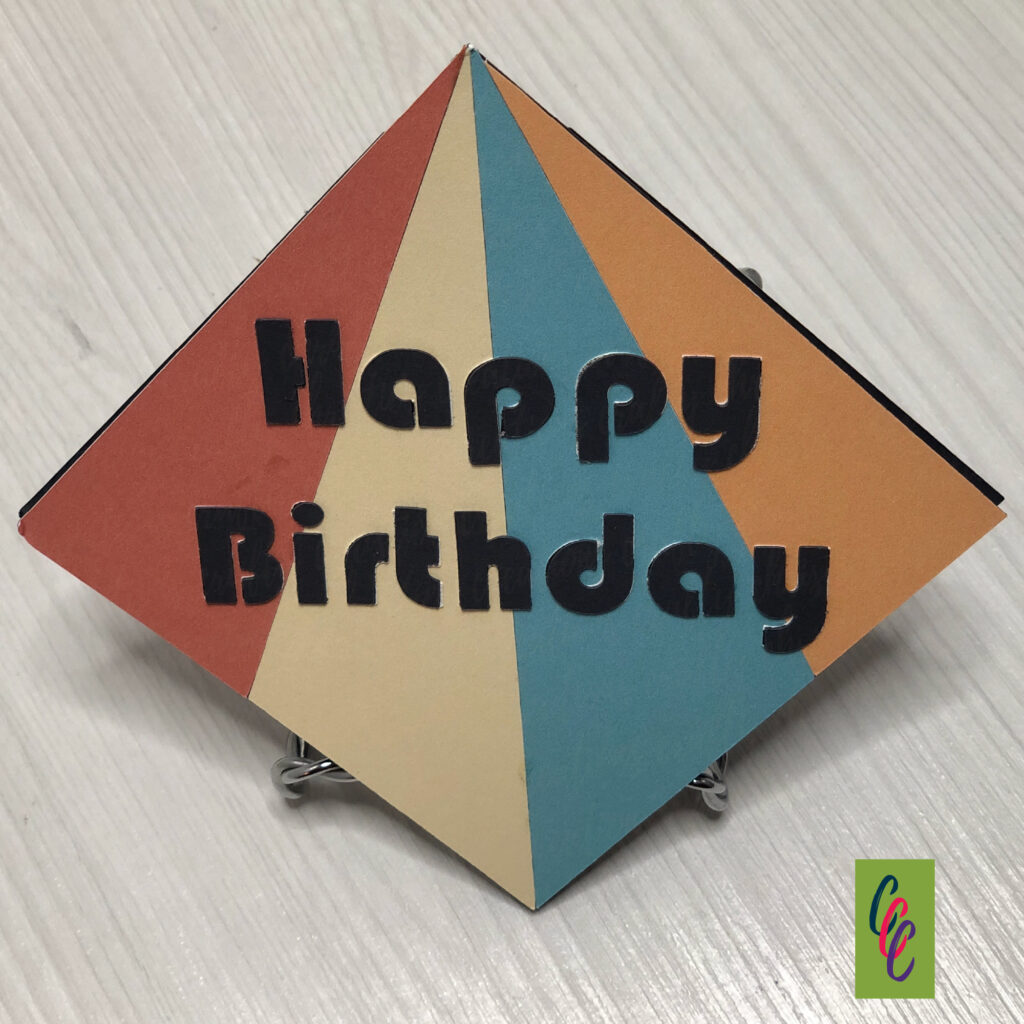
Are you tired of those print and cut projects showing not cutting perfectly on the edge? Adding a print bleed in Silhouette Studio is a great way to hide those imperfect cuts. In this example, I’m making my retro-themed birthday card. I didn’t have the correct colors of cardstock so I made the triangles as print and cuts.
Supplies:
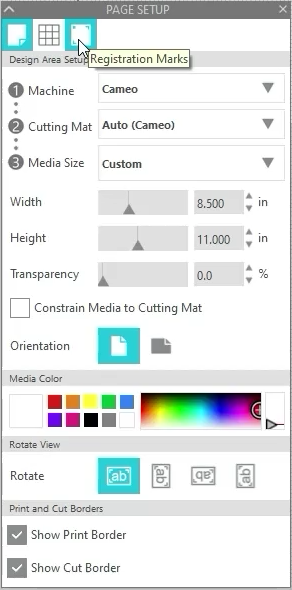
Step 1: Page Setup
In the page setup panel, turn on the print border and the cut border. This will help you keep everything within the margins so you don’t end up reprinting your project.
Step 2: Print Bleed
On the page setup panel, open the registration marks screen. Turn on the registration marks and align the design within that area. Then look for the print bleed at the bottom of the panel.
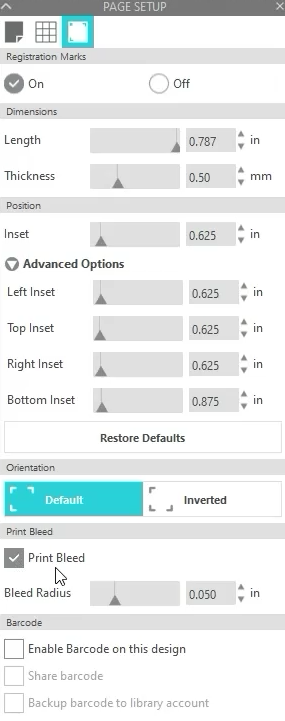
Check the box next to print bleed and choose the bleed radius. I used .075 inches. You won’t see these changes on your mat, but they will show up on the print preview page.
Step 3: Print the Design
On the print preview screen, ensure all the registration marks are visible and that each element has enough space so they won’t run into each other. Then send your page to the printer.

Step 4: Cut the Design
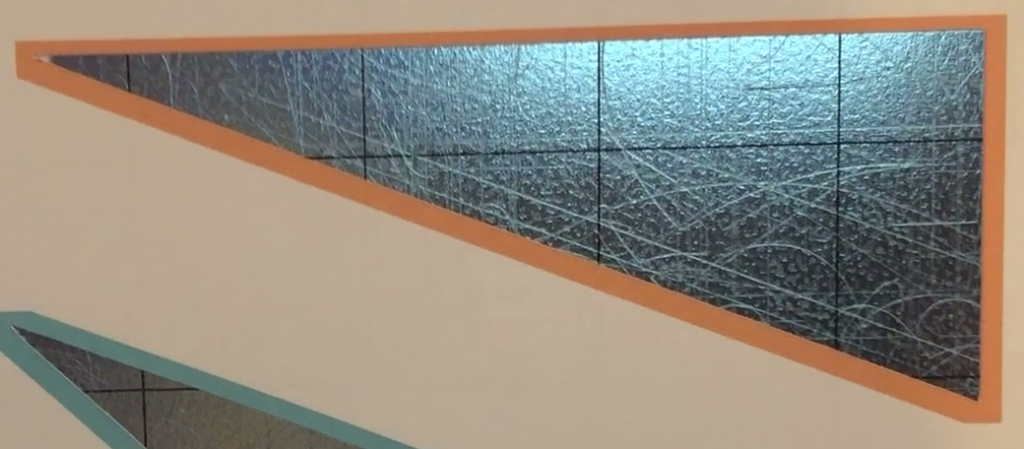
Align your page with the square in the top left corner of your cutting mat. Your Silhouette will read the registration marks to know where to cut and then should begin cutting. You’ll notice there are still colored areas on the outside around each cut shape. This is the bleed. It ensures that even if the cut is slightly off there will be color all the way to the edge of the design.
Step 5: Assemble the Card
Now that you have cut all the shapes, continue cutting the rest of the card elements. Then you can assemble your card like normal!
For more information on adding a print bleed in Silhouette Studio, check out the video below.


