

Every January I like to go through the house and start my “spring cleaning.” This includes my craft room, which is in constant disarray. I struggle to keep this area tidy since I’m coming and going with unfished projects everywhere. I’m sure you can relate! I’m going to share with you 4 easy craft space organization tips to keep the clutter to a minimum.
Tip 1: Paper Storage
I struggled for a long time trying to come up with a system to keep my cardstock organized. I tried many different methods before I landed on what I’m doing now.
Supplies:
Cardboard
For my sheets of paper, I mostly use 8.5×11 but this works for 12×12 sheets as well, I built a storage rack. I took some stackable wire cubes and zip-tied shelves in between the cubes at each rung. Then I placed a piece of cardboard on the shelf so the cardstock won’t warp to the wire.
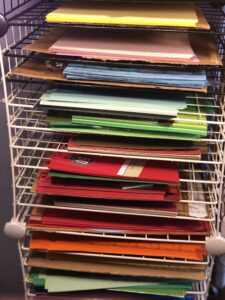
I’ve been using this shelf for over 5 years now and I love that all my cardstock is visible and I can quickly see what I have. Before using this, I was constantly buying more cardstock because I didn’t have a good way to visualize what I had. Just keep this rack out of direct sunlight so the paper doesn’t fade.
As for scraps, I used to just keep a box full of scraps but I found it was always a daunting task to dig through the box to find things. It was to the point I never used my scraps because it was easier to just find a full sheet of cardstock. This was super wasteful so I was forced to come up with a different solution.
Now I use zipper pouches that are labeled for each color. I have them sitting on the shelf next to my silhouette. Easy access and color coding have made it so that I always go to my scraps first before cutting a new sheet of paper.

I save any scrap that is bigger than 2-inch square. Most cards I’m making require paper piecing and those are usually small pieces so I’m always finding I can use my scraps on these projects.
Tip 2: Vinyl Storage
What crafter doesn’t hoard vinyl? I swear I have enough permanent and htv to last me the rest of my life. I love stocking up when the amazing Black Friday deals are happening. With all this vinyl comes problems of where and how to store it.
Supplies:
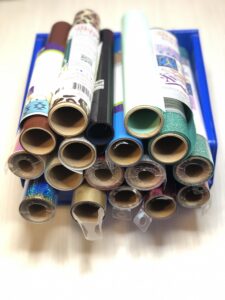
My rolls of vinyl I like to keep on the roll and in a stackable bin. Again, I love being able to see what I have at a glance. The bin I’m using was a toss away from work, but I’ve linked to something that is much cheaper and will work just as well.
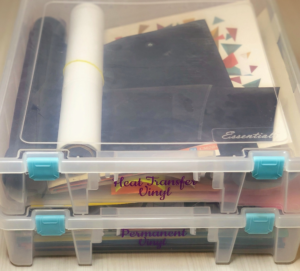
When I get small scraps or for the permanent vinyl that I purchase in sheets, I like using storage boxes. I have each box labeled with the type of vinyl it contains. This isn’t my favorite way to store it because I still have to flip through all the sheets to find what I want, but it has been working well for now.
Tip 3: Marker and Pen Storage
Another problem spot for me was my desk. I have tons of colored pencils, markers, pens, and tools sitting on my desk. I needed a simple way to keep them organized and I didn’t want to spend a bunch of money.
I upgraded my used pasta and pickle jars to become desk jars. I also took some smaller mason jars I had laying around and those now contain sequence and other small odds and ends.
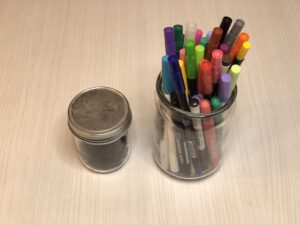
My biggest struggle was not knowing what I had, so keeping everything in glass containers has made it really easy for me, plus I’m upcycling things to keep them out of the landfill. These can easily be dressed up with some mod-podge and pattern paper or even some ribbon.
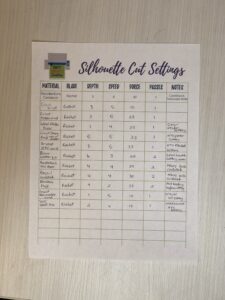
Tip 4: Cut Machine Settings
My last tip is to keep your cut settings organized. We all know finding the perfect settings can be an ordeal. Once you’ve got figured out, you don’t want to lose those. I have found that keeping these settings in Silhouette Studio doesn’t always work when there is an upgrade. Use my Cut Setting Tracker Form to keep track of it all. (Fill out the form below to grab your copy) Start a binder and keep it close to your machine, a quick glance will have you cutting perfectly every time!
I hope these 4 tips will help you get organized so you can spend more time crafting than tidying up. Check out the video below for more information.


