
If you are big into Halloween decorations, you’re going to love today’s projects! I’m all about finding ways to use up scraps and these projects fit the bill. Not only can you use vinyl scraps, but I’m using my leftovers from building my fence this summer! Here are 4 Halloween Wood Projects to make with Silhouette. I think you’re going to love these ideas!
Project 1: The Door Hanger
I’m always switching out the sign on my front door. I’m working on making one for every season.
Supplies:
Black Removeable Vinyl
Orange Acrylic Paint
Oval Door Hanger
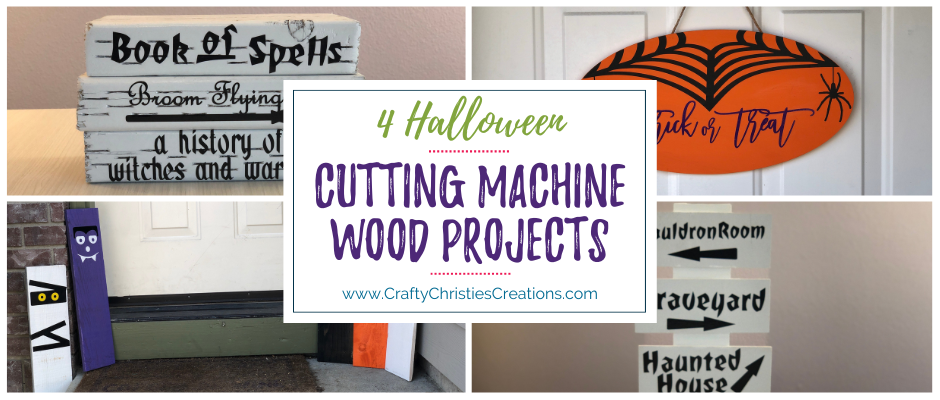
I used an oval door hanger sign I picked up at Craftwarehouse. I stocked up on these wood signs a few years back. You can easily make a similar design with a circle door hanger.
I painted the wood orange and let it dry overnight. In Silhouette Studio, I drew out an oval the size of my sign. Then I added a spider web design over the top. I made a copy of the oval and then also selected the spider web and hit crop. This made the web match the curve of the oval perfectly. I finished up the design by adding some spiders on either end and “Trick or Treat” to the bottom.
Since the design is so large I had to use my 12×24 inch cutting mat. For the “Trick or Treat” I only had a 12×12 inch sheet of vinyl so I cut the words in 2 parts and added a registration mark to each. When it was time to add it to the sign, I transferred one part of the saying to the other and lined up the registration marks.
I ran out of permanent vinyl so I used removable vinyl for the spider web. I was able to add it to the sign without using any transfer tape. I used my masking tape style transfer tape for my words so it wouldn’t peel up the paint on my sign.
This was a pretty easy door hanger to make and it looks great hanging on my front door.
Project 2: Halloween Directional Sign
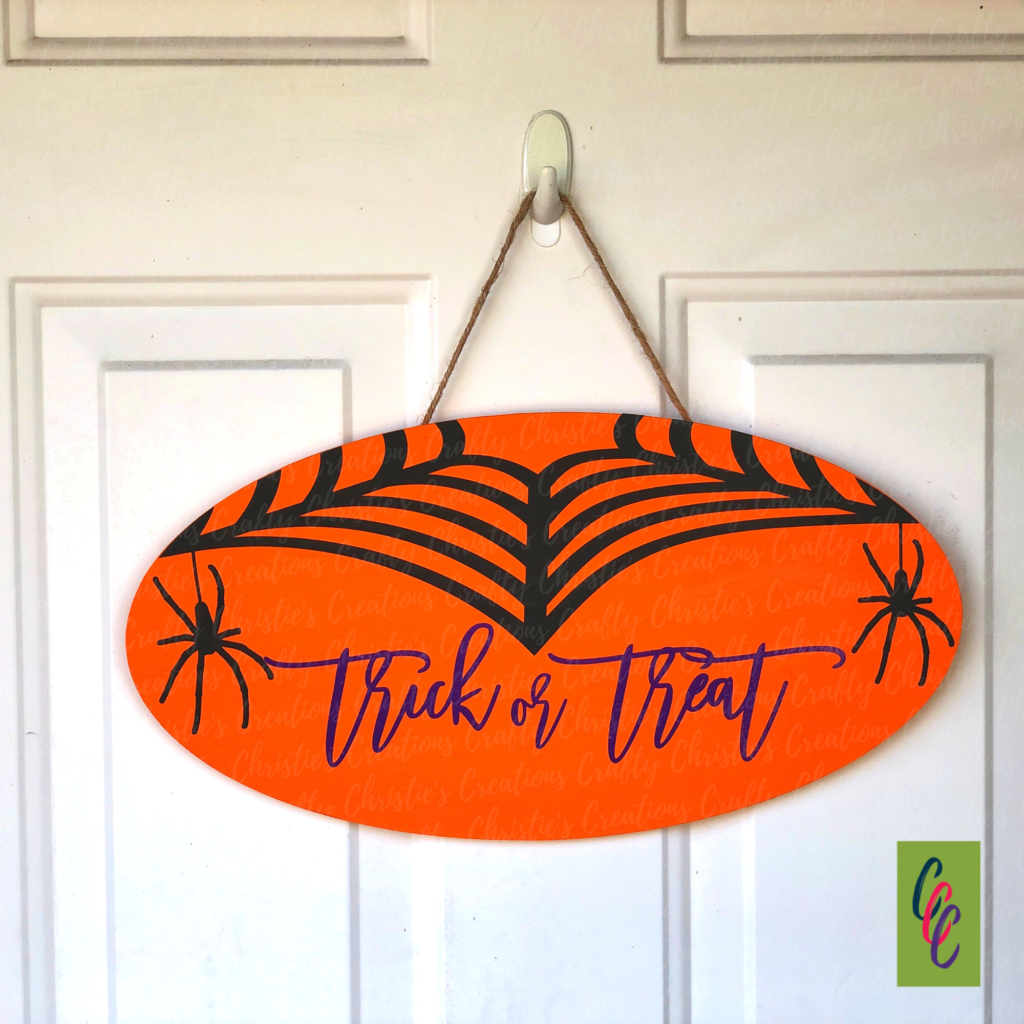
This project was super fun to make. It is my take on those large directional yard signs.
Supplies:
Basswood Sheet
Wood Planks
Craft Knife
T-Ruler
Hot Glue
White Spray Paint
Directional Sign SVG
I started off by spray painting the wood planks I picked up at Dollar Tree. Then I added the SVG designs that I cut out in black permanent vinyl.
Next, it was time to make the base. I pulled out a sheet of basswood I had laying around. Using the craft knife and a T ruler I cut out a 3×12 inch piece to attach the planks. Then I cut out a 5×2 inch piece to serve as the base. In the base, I cut out a small rectangle the size of the backing piece. I slid the backing into the base and glued it into place. I cut another base rectangle and glued that to the bottom for extra stability.
Using glue I attached the planks to the backing and my sign was ready to stand on its own!
Project 3: Halloween Porch Signs
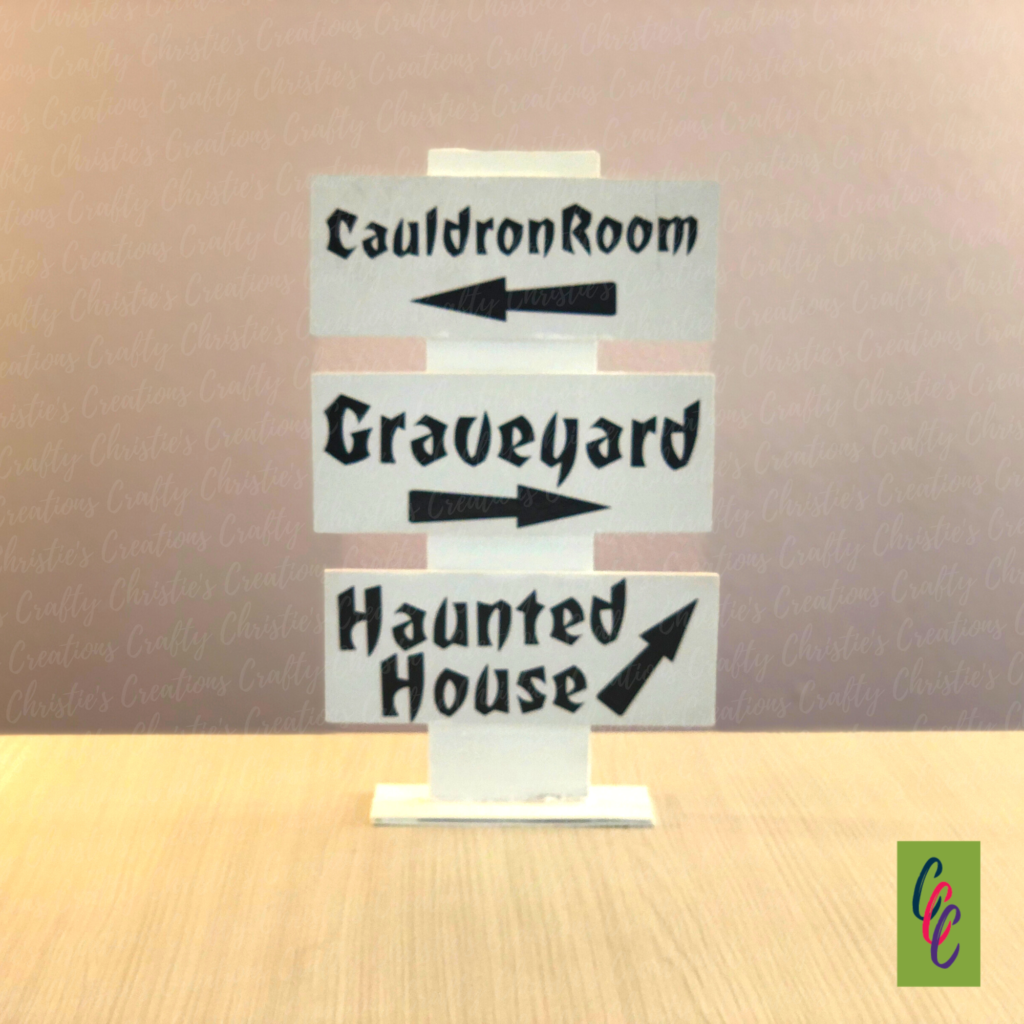
I used scrap fencing boards for this project and I love the way they turned out.
Supplies:
FREE Halloween Faces SVG
Spray Paint in Black, Orange, Purple, and White
Wood Planks / Fencing Boards
Sand Paper
I sanded down the fence boards and painted them in different colors. In Silhouette Studio, I sized the faces to maximize the width of the boards. Then I cut out all the vinyl for the faces also from scraps.
This project was really quick to put together. Even though the faces seem small, they are still visible from the sidewalk.
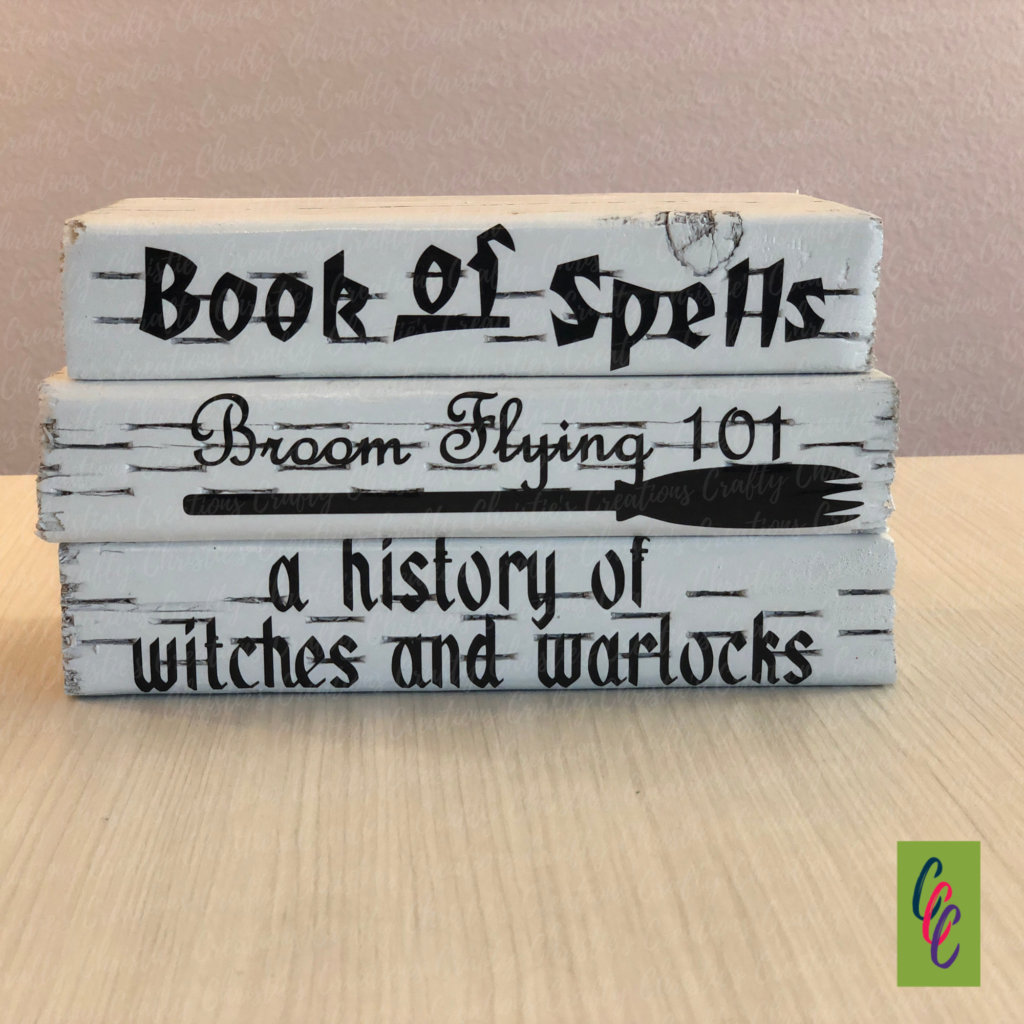
Project 4: Halloween Stacked Books
Stacked books are a pretty popular decor to make. I’m starting to see them for every season.
Supplies:
Halloween Books SVG
3- 8 inch sections of 2×4 wood
White Spray Paint
Again I used scrap wood. I painted the 2×4 with white paint. The 2×4 I used has lines cut into it since it is weather treated.
After I got the book titles cut on my silhouette cameo, I used transfer tape to place them on the thin edge.
While the cut lines in the boards make it a bit hard to read, I do like the way the books turned out.
I’m really in love with all my wooden Halloween decorations.
Check out the video below for more details on how I created these projects.


