

Do you struggle with heat transfer vinyl? Layering htv can be difficult because it tends to shrink when it gets hot. I’ve got some tips and tricks on how to layer heat transfer vinyl to make it simple.
Supplies:
White HTV
Yellow Sweatshirt
Step 1: Cut out your design
Use your Silhouette to cut out the different layers of your design. Remember to mirror your layers so they will read correctly when you apply them to your garment.
Step 2: Weed your design
Weed out the layers of your design and then trim the carrier sheet very close to the edges of the graphic.
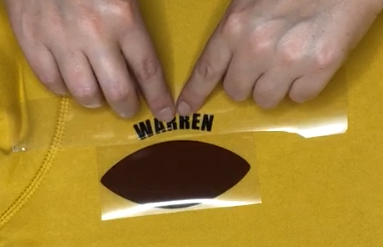
Step 3: Layer your design
Any parts of the design that won’t overlap can be applied to the fabric at the same time. I’m adding the name “Warren” and the football shape at the same time. By trimming down the carrier sheet, the pieces should fit together without overlapping.
Step 4: Apply the heat
Between trial and error and Cricut Easy Press recommendations, I was able to come up with the best time and heat settings for my htv. I’m using 320 degrees Fahrenheit for about 7 seconds to lightly tack down my first layer.

Repeatedly applying heat can burn the vinyl, which is why you want to barely stick down the first layer before removing the carrier sheet.
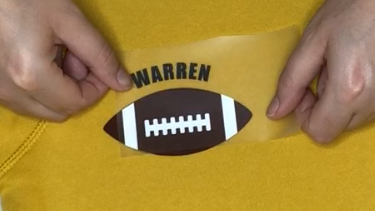
Step 5: Apply the next layer
Now that the first layer is tacked down, it is time to apply the second layer. Use your extra carrier sheet from the first layer to completely cover the entire design before applying heat. Again use a minimal amount of time to stick down the second layer and remove the carrier sheet.
Continue with this process until all the layers are tacked down.
Step 6: Apply more heat
Once the entire design is tacked to the fabric cover the entire design with a cloth or parchment paper and apply more heat and pressure. At this point, you are making sure everything is fully melted into the fabric and ready for wearing.
Step 7: Wash and wear
Let your garment sit and cool. Wash your fabric inside out and wear it with pride!

Check out the video below for more details on layering heat transfer vinyl.


