
Have you seen all the fun paper marbling on Pinterest? It’s been going on for years. I tried it last summer using shaving cream and watercolor paper. It was really fun to do and I learned a lot. This year, I am marbling Easter eggs. I will admit this is just as, if not messier than the traditional egg dying. Nevertheless, I had a blast doing it and the kids will love it too.
Supplies:
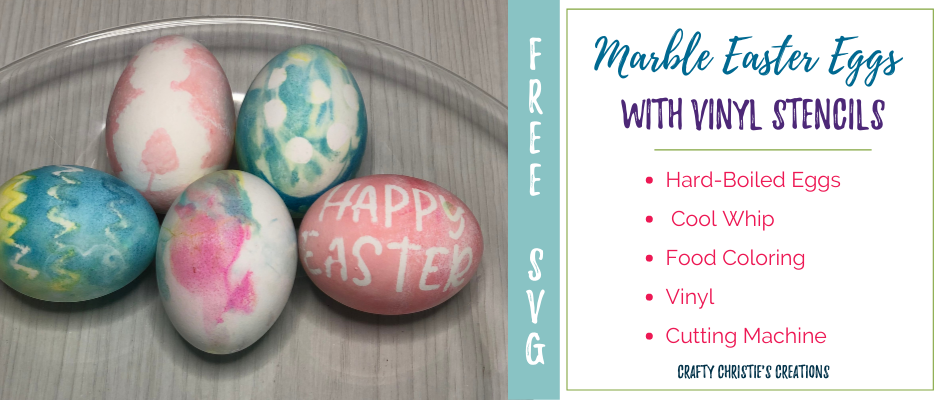
Hard-boiled eggs
Cool whip/shaving cream
Food coloring
Paper towels/coffee filters
I used my Easter SVG Design Bundle, which you can grab for free below, to make some fun stencils. This SVG bundle is also part of the April Craft Challenge. I did a rough measurement of the egg top to bottom and came up with 2 inches. I shrunk down my designs to this size, using the aspect ratio lock to maintain proportions.
I plan on using the positive and negative spaces of the designs. I usually add a weeding box, but I think these are simple enough I can cut them square later. With the size relatively small, I am able to use up some of my scraps of the vinyl.
Once I have those cut out, I peel up the stencil with my weeding tool. Most of them I can peel without using transfer tape, but I have it handy just in case.
Now for the fun part! I’m using coffee filters to contain my mess, paper plates will work great too. Since the dye can sometimes leech into the egg itself, I’m using cool whip instead of shaving cream. I do plan to eat these eggs later and shaving cream is not edible.
Place a glob of cool whip on your surface and add a few drops of food coloring. Use a toothpick to swirl and mix the colors as you like. Then roll the egg through the mixture. I found the longer the egg sits in the cool whip the better the results.
When I did the paper marbling, I took a ruler and scraped off all the excess. We don’t really have this option with the egg, so I took them to the sink and rinsed off the cool whip.
Now all that is left is to peel back the vinyl to reveal your masterpiece!
Here is the video of the full process.


