Making string art has been on my list of things to try for a few years. I finally decided it was time to make it happen. Follow along as I teach you 2 different ways to make a string art template in Silhouette Studio.
Supplies:
String
Nails
Copy Paper
Permanent Vinyl
Transfer Tape
Wood
Step 1: Prepare the Wood
I used scrap wood I had lying around. Ideally, take the time to sand the wood before staining or painting. Let it dry for 24 hours before adding the art.
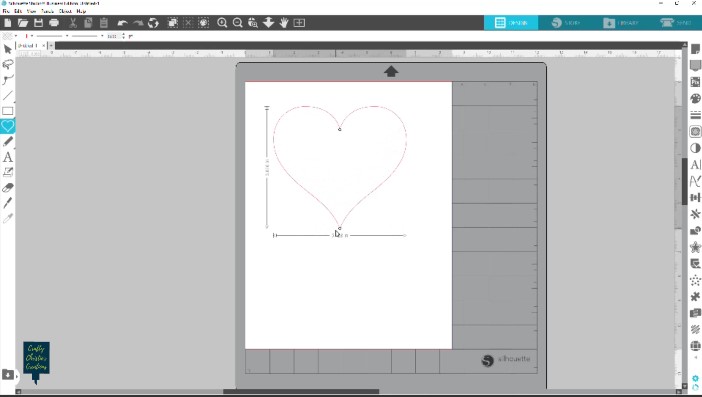
Step 2: Create the Heart Shape
In Silhouette Studio, create a heart design. If you are using Basic or Designer’s Edition, create a heart by welding a triangle and 2 circles, or upload a heart-shaped file. If you are using Designer’s Plus or Business Edition, use the heart flexi shape to create the heart. Then convert the shape to a path.
Step 3: Make the String Art Template
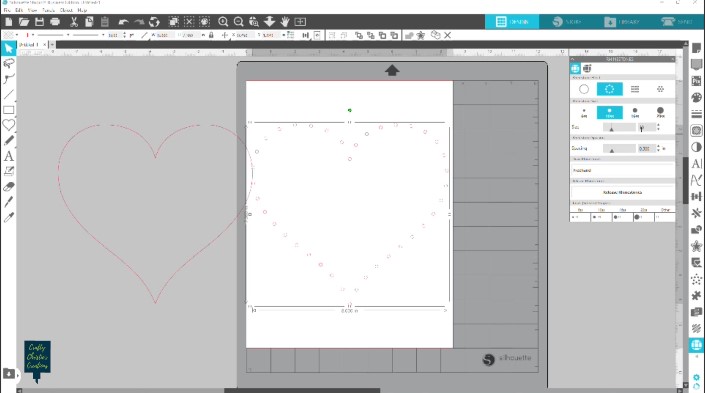
The first way to do this is in the rhinestone panel. With the heart selected use the edge effect to place small circles around the outline of the heart shape. Adjust the spacing to its maximum size.
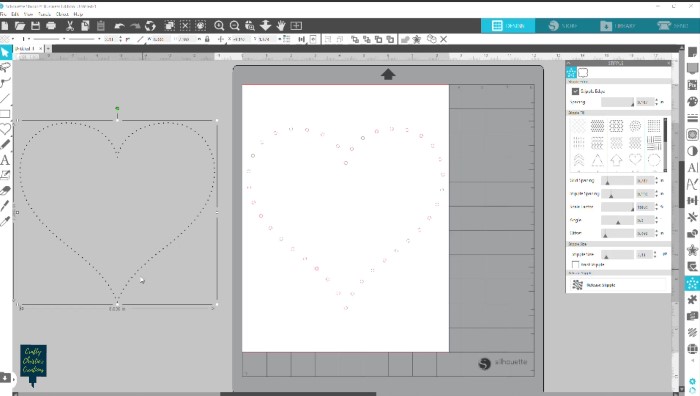
The second way to do this is in the stipple panel. With the heart selected click the stipple edge box and adjust to the maximum spacing. You’ll still want to skip a few of the holes when creating the string art.
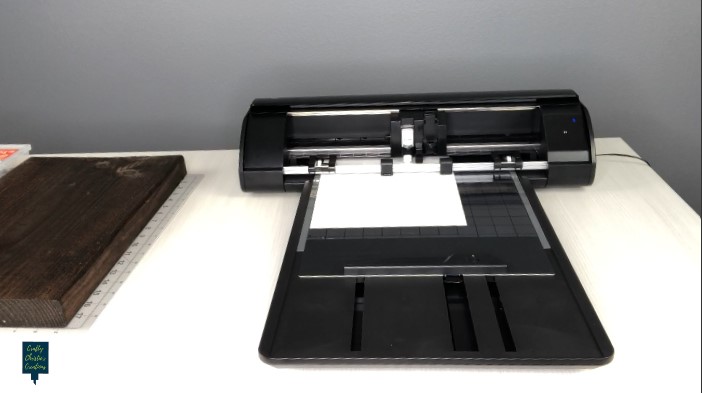
Step 4: Cut out the String Art Template
Depending on the size of your heart you can print it or cut it out. For printing, ensure there is either a fill color for the holes or give the red lines a point value so they will show up when printed.
My design is too large for printing so I’m cutting my template out on copy paper using my electrostatic mat with my Cameo 5. You definitely want to use thin paper for this so its easy to tear off the nails when you are done.
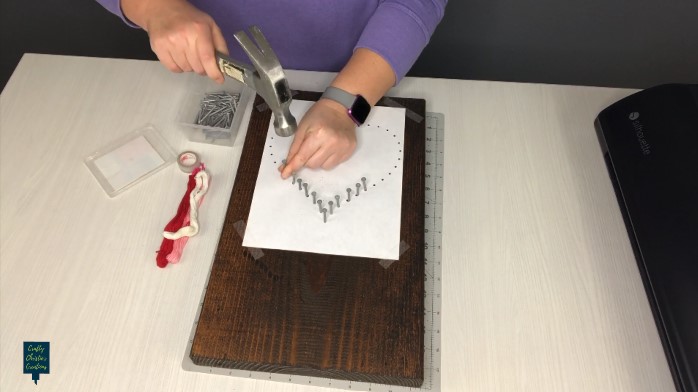
Step 5: Place the Nails
Center the template on the wood and tape it in place. Add a nail into the holes to make the heart shape. The trick is to make the nails roughly the same height in the wood. When all the nails are in place, remove the template. Use tweezers to remove any paper stuck around the nails.
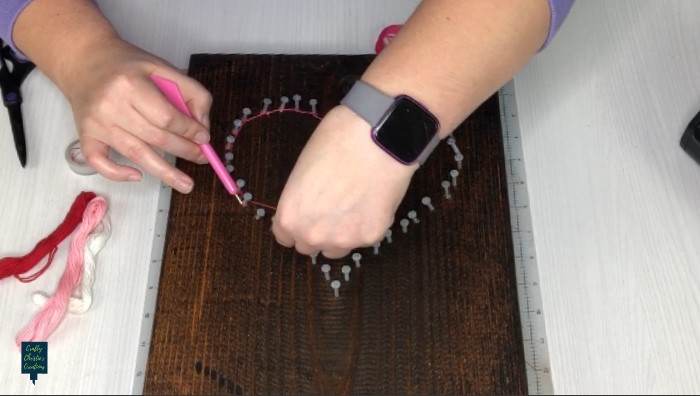
Step 6: String the Outline
Use yarn or embroidery floss to string the design. Tie the string onto a nail then wrap it around the next nail and keep going all the way around the design. I did the inside and the outside of the nails, you only need to do the outside. This forms a defined border around the design.
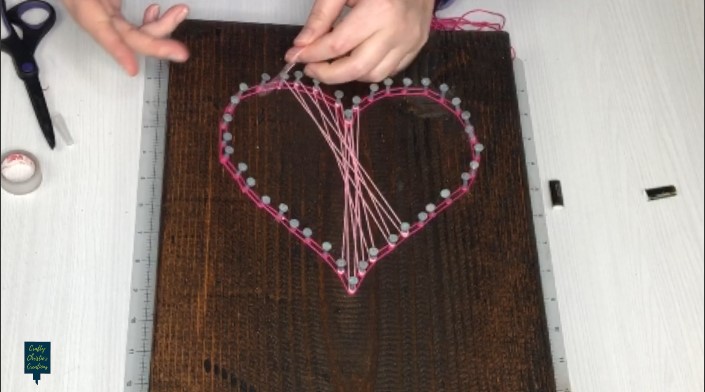
Step 7: String the Inside
There are tons of techniques to do this, or to just randomly add string all around, but I like a structured pattern. Tie the string onto a nail and then find another nail that is opposite. Wrap the string around it and then to the nail to the left of your starting nail. Then back up to the nail to the right of the opposite nail. One side of the design will be moving left while the other side will be moving right. If you want to do just one color do this around the entire heart and then tie the string onto the last nail.
If you want to make your design multicolor, decide how many nails will be used for each color and tie off the color when you’re ready to move on. For more ideas on string patterns check out this post.
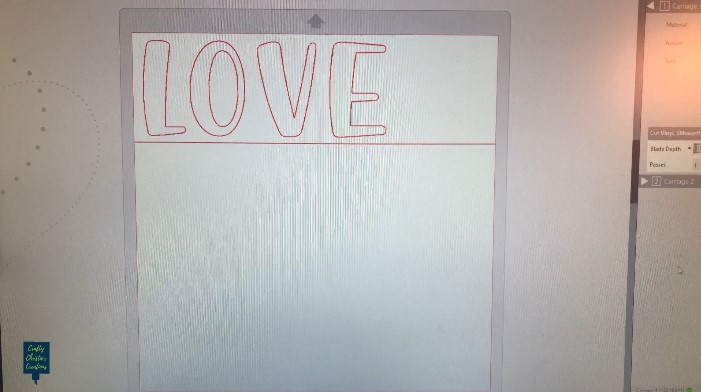
Step 8: Add the Text
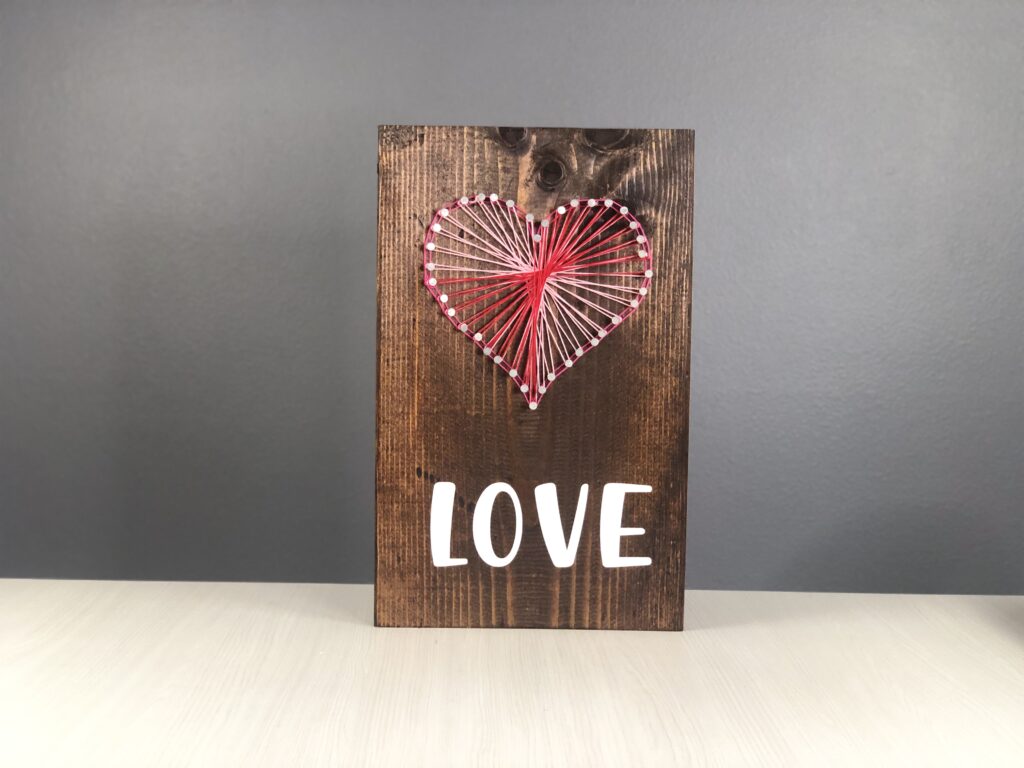
I decided to add the word love to the bottom of my board. I cut it out of permanent vinyl and used transfer tape to apply it to the wood.
Step 9: Show it Off
That’s it, you have completed your string art project! Now it is time to put it on display. If you want to hang your work, I recommend adding the hangers on the back before putting in the nails.