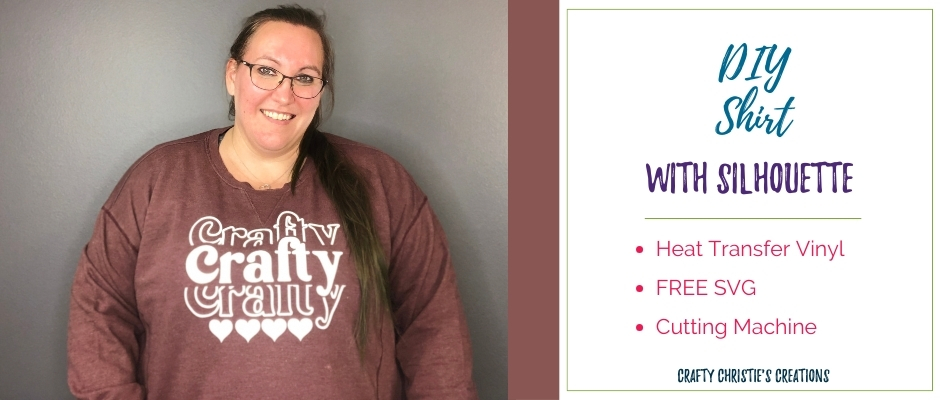
With as much time as I spend in my craft room, I thought it was time to make a crafting shirt to let the world know how crafty I am. This is a quick project that can be completed in about 30 minutes. Follow along as I am making shirts with Silhouette.
Supplies:
Shirt
Glitter HTV
Crafty SVG (below)
Cutting Machine
Heat Press
Step 1: Prepare the Design for Cutting in Silhouette Studio
Complete the form at the bottom of this page to receive this svg for FREE! Download the file to your computer. Open Silhouette Studio, navigate to where you saved the file and input it into the software.
I decided to add some hearts to the bottom of the design using flexi shapes. You can do this as well or leave the design as is. Change the colors of the outlines if you want. Once the design is how you like it, group everything and resize. In the replicate panel, choose to mirror the design to the right. Remove the original design and place the mirrored copy on the artboard.
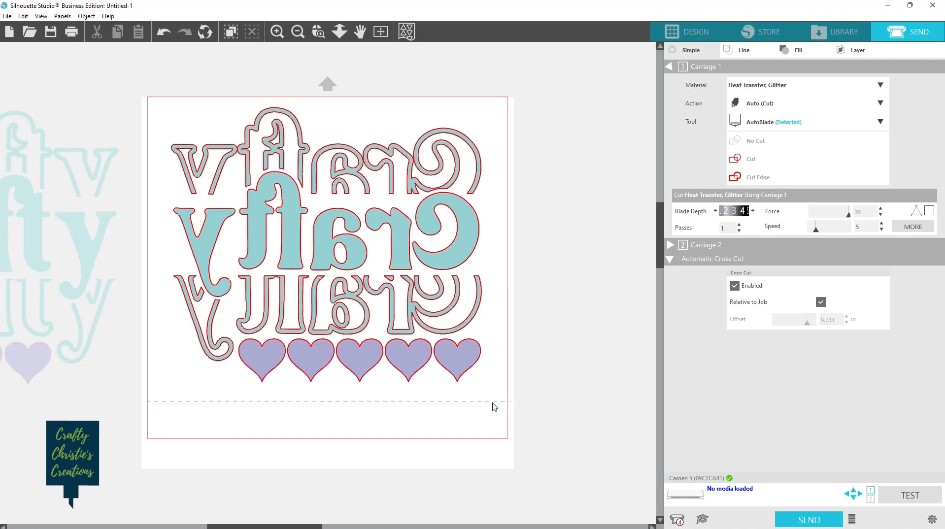
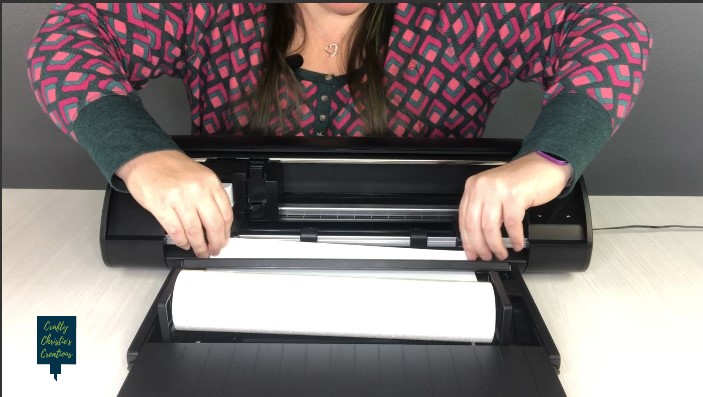
Step 2: Cut the Design from Heat Transfer Vinyl
Set up the htv roll in the roll feeder, carrier sheet side down. On the send panel, select the correct settings for your htv. I’m using my Cameo 5 and no mat. This automatically brings up a cross-cut option at the bottom. This is to cut the material off the roll just under the design. I like this feature since it is one less step I have to do later.
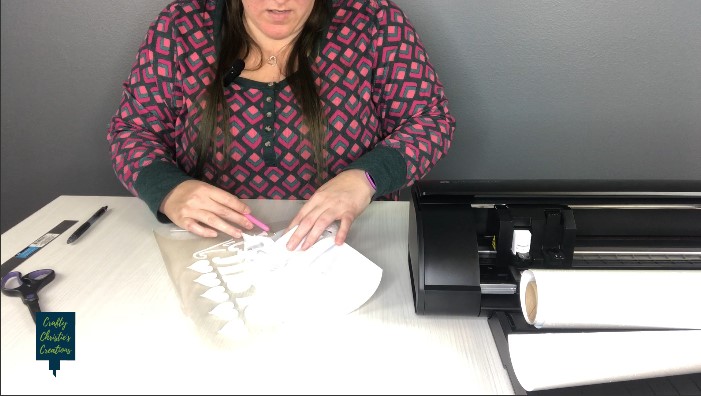
Step 3: Weed Out the Design
Remove the extra htv leaving just the design. Check the edges of the htv for tiny slivers of vinyl left behind after cutting. These will end up on your shirt if you aren’t careful!
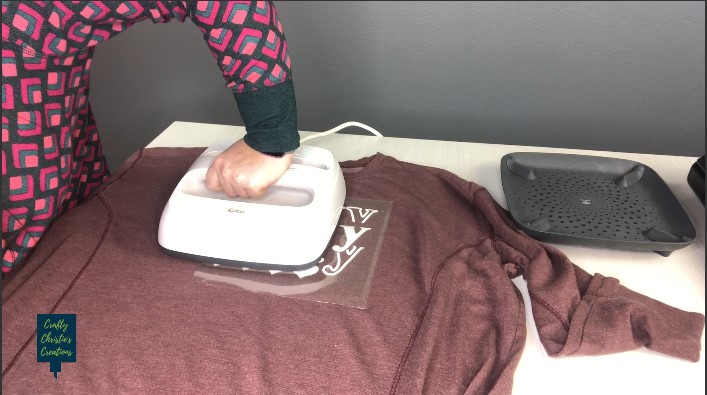
Step 4: Apply the Design to the Shirt
Pre-press the shirt to remove moisture and wrinkles. Fold the shirt in half and make a crease down the middle. Do the same to the carrier sheet of the design. Apply the design about 3 finger widths down from the collar and center. Line up the crease in the carrier sheet with the crease in the shirt to find the centers. I’m using my Easy Press 2 at 400 degrees for 15 seconds to press my design.
If you need more help with the placement of htv on a shirt check out this post!
Step 5: Show it Off
You did it! Wear your new crafty shirt with pride! That is how easy making shirts with Silhouette can be!