
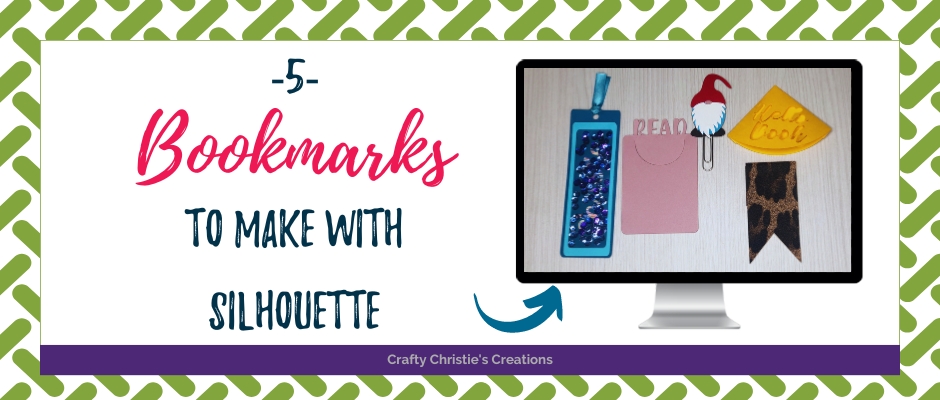
Are you a book lover who enjoys adding a personal touch to your reading experience? Bookmarks have many uses besides holding the place in a book you read for fun. I use bookmarks in textbooks, calendars, and my planner. I’m excited to share 5 bookmarks to make with Silhouette. Whether you’re an avid reader or just love crafting, these bookmark ideas will make reading more fun. They make great gifts as well!
Bookmark #1 – Paper Flap Bookmark
Supplies:
Cardstock
Mr. Rabbit Font
Cutting Machine
Step 1: Create the Bookmark Shape
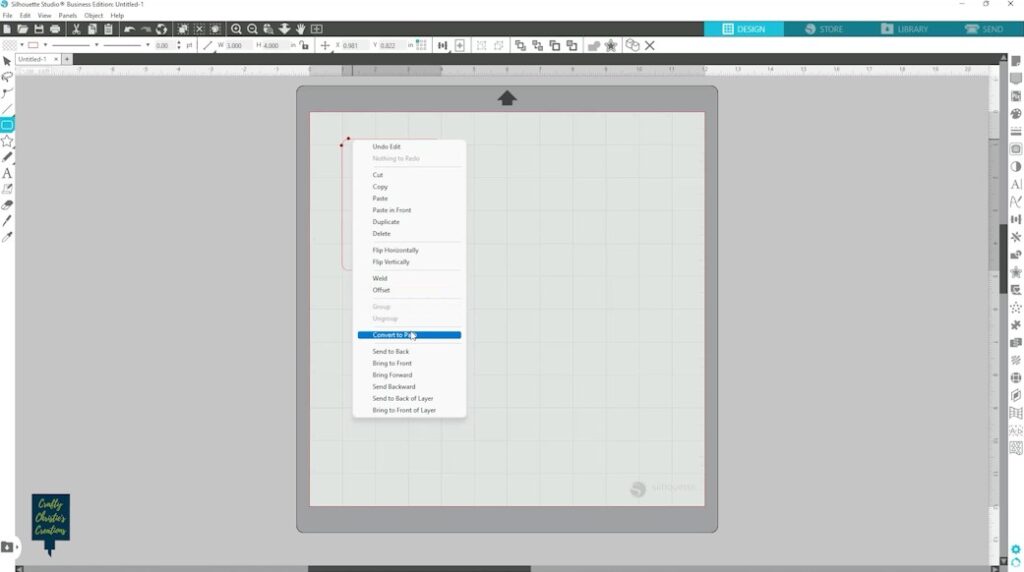
Start with a rounded rectangle shape and adjust the dimensions to 3 inches wide by 4 inches tall. Ensure your shape is a complete path by right-clicking and selecting “Convert to Path.” Fill the shape with your desired color.
Step 2: Create the Cutout
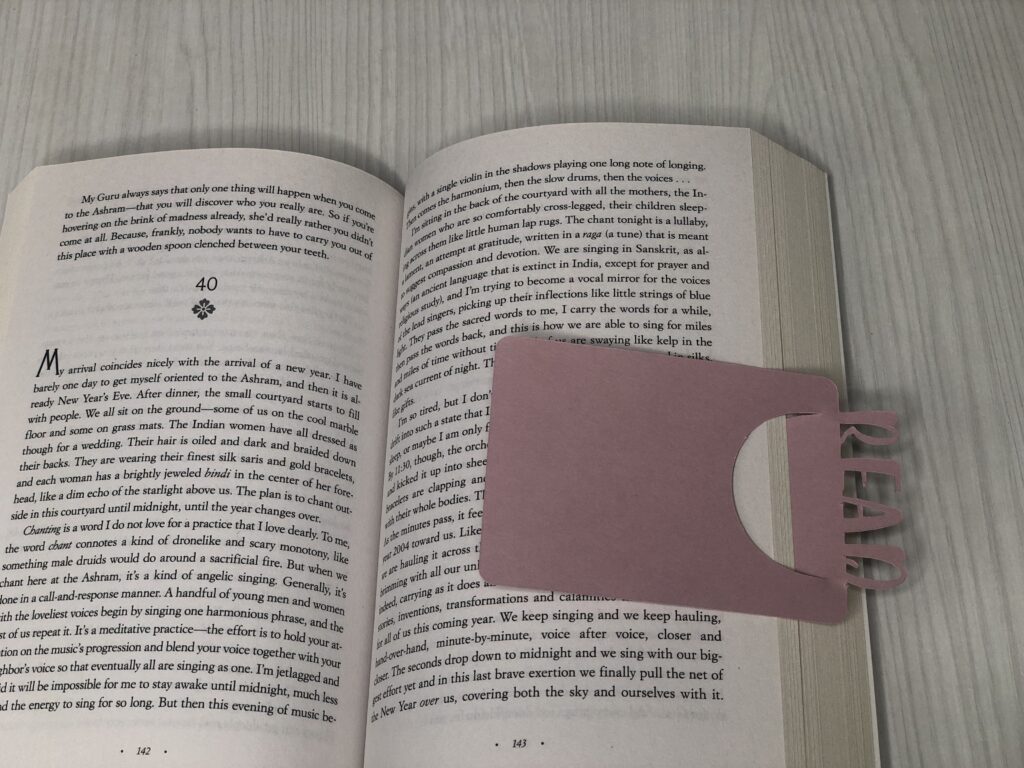
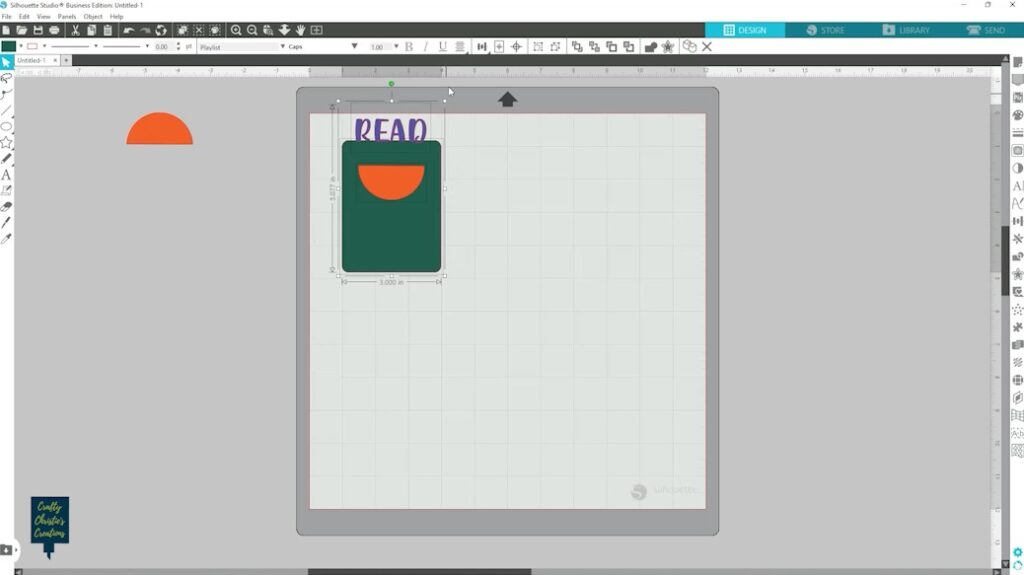
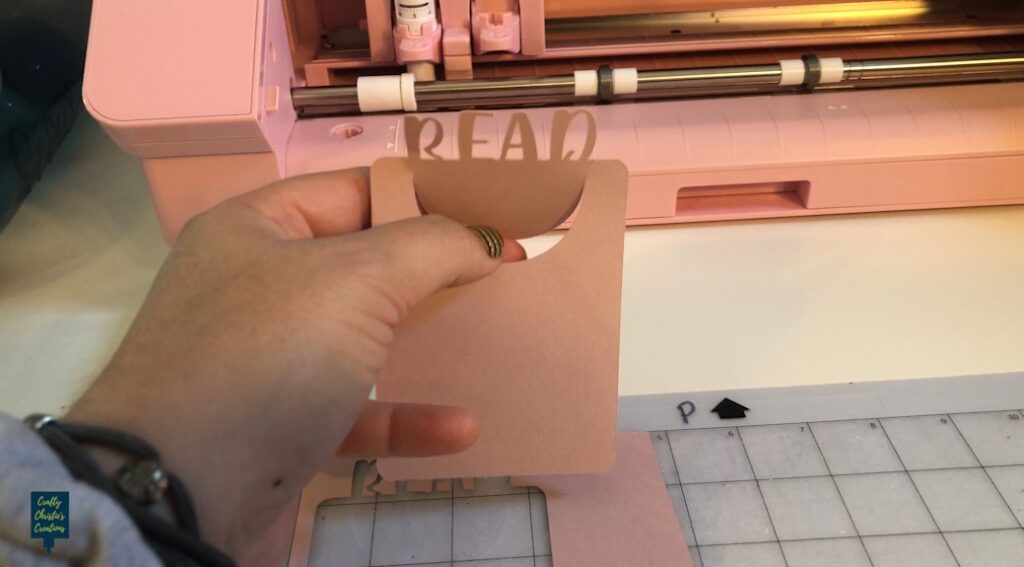
Draw a circle with a diameter of 2 inches. Cut the circle in half using the Knife tool. Align the half-moon shape to the top of your rectangle, leaving some space at the top.

Step 3: Add Text
Add text using your favorite font. I wrote out the word “READ” in all caps. Center align the text to the top edge of the bookmark. Select both the text and rectangle, then “weld” them together to make one shape.
Step 4: Cut the Slit
Use the knife tool again to draw a cut line along the curved side of the half-moon shape. This will create the slit for the page to fit under.

Step 5: Put it to Use
Now, when you use this bookmark, the top of the page will slide under the half-moon flap, keeping your place in the book. The word “READ” will show on the outside of the book.
You can easily customize this design to match your reading style. Use a different word and patterned paper to make it your own!
Bookmark #2 – Corner Bookmark

Supplies:
Cardstock
Glue
Senada Font
Cutting Machine
Step 1: Creating the Base Shape
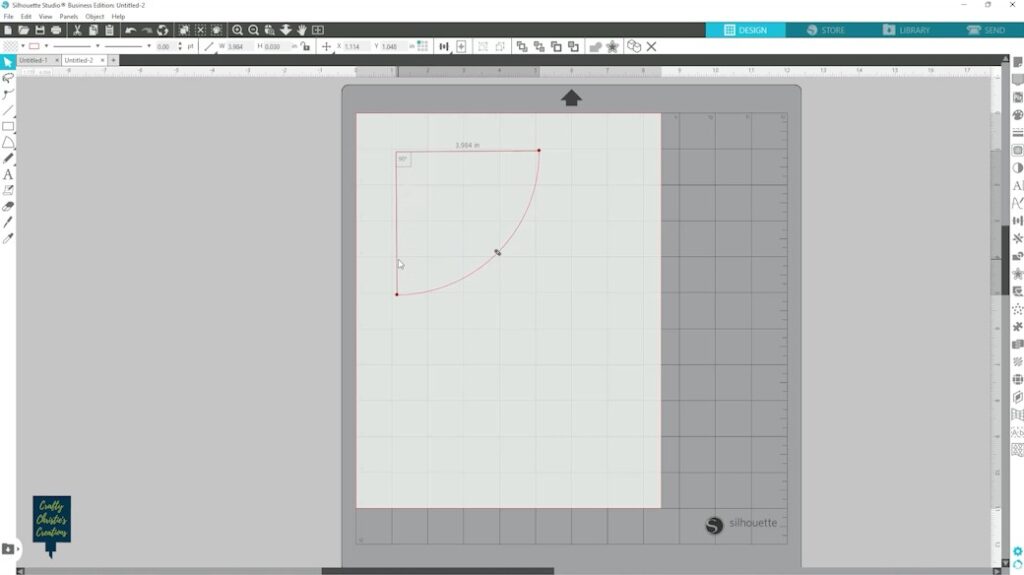
In the flexi shapes, choose the quarter circle shape. Adjust its size to your liking I’m doing 3 inches, but aim for a 90-degree corner to match the edge of your book. Right-click on the shape and select “Convert to Path” to make it a complete path. Fill the shape with your preferred color.
Step 2: Adding Folding Tabs
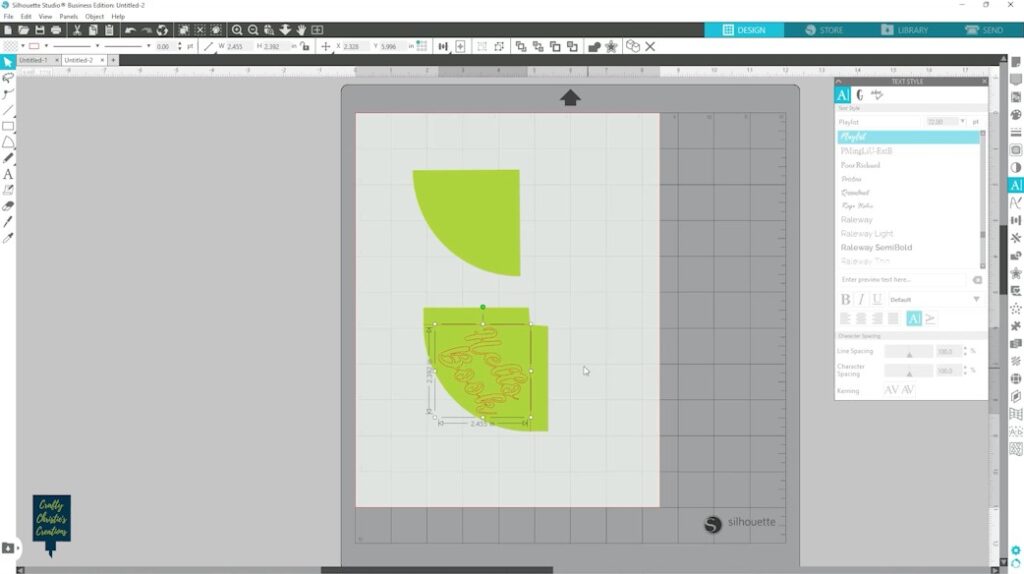
Make a copy of the shape and create tabs on this copy. To create the folding tabs, draw a rectangle shape and place it on one of the straight sides of the triangle shape. This tab will be what you fold and attach to make the opening for the page. Make a copy of the tab and place it on the other straight side of the triangle shape. Use the line tool to draw scorelines across where the tab meets the triangle shape. Then “weld” the tabs and the triangle.

Step 3: Decorate the Front of the Bookmark
I wrote out “Hello Book” and cut that out of the front. If you want to prevent the centers of letters from falling out, consider using a stencil font or adding bridges to connect the inner parts.
You can write anything, add an animal face, or even just use pattern paper.
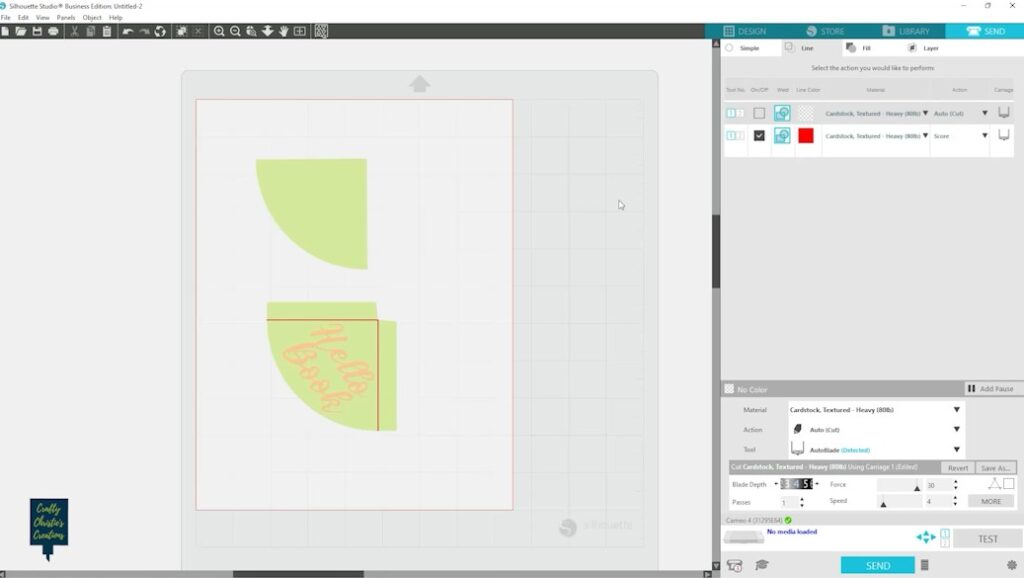
Step 4: Cutting and Scoring
Cut by line color to differentiate between the cut lines and the scorelines. Make the scorelines a color you aren’t already using in the design.
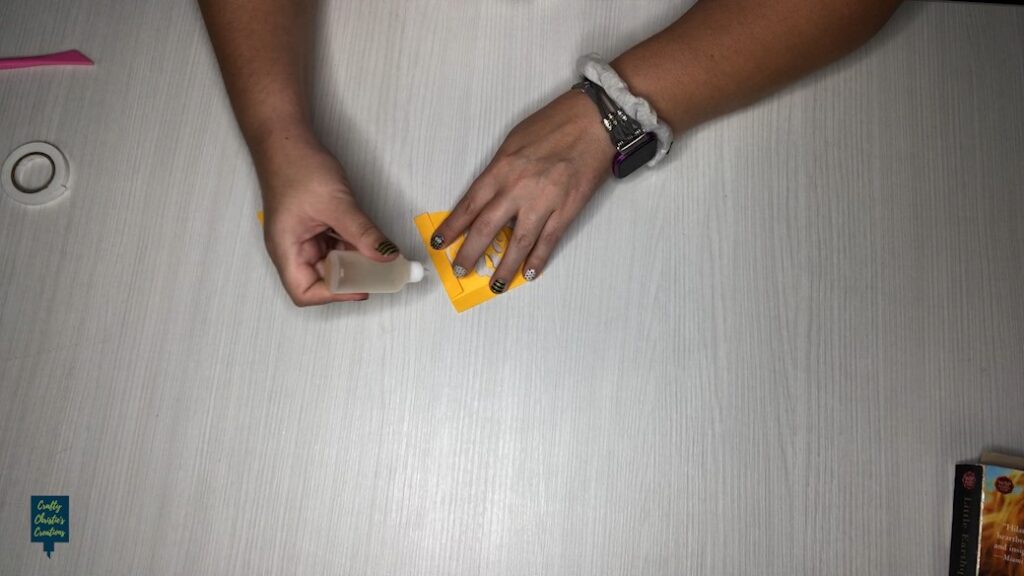
Step 5: Assembling Your Corner Bookmark
Fold the bookmark along the score lines to create the folding tabs. Apply glue to the tabs and attach the other triangle on top of the tabs. Press the tabs firmly to ensure a secure hold.
Step 6: Using Your Corner Bookmark
To use your corner bookmark, simply slide it onto the corner of a book page. It doesn’t add extra bulk and barely shows when the book is closed.
Bookmark #3 – Decorative Paper Clip Bookmark
Supplies:
Cardstock
Glue
Hot Glue / Foam Tape
Cutting Machine
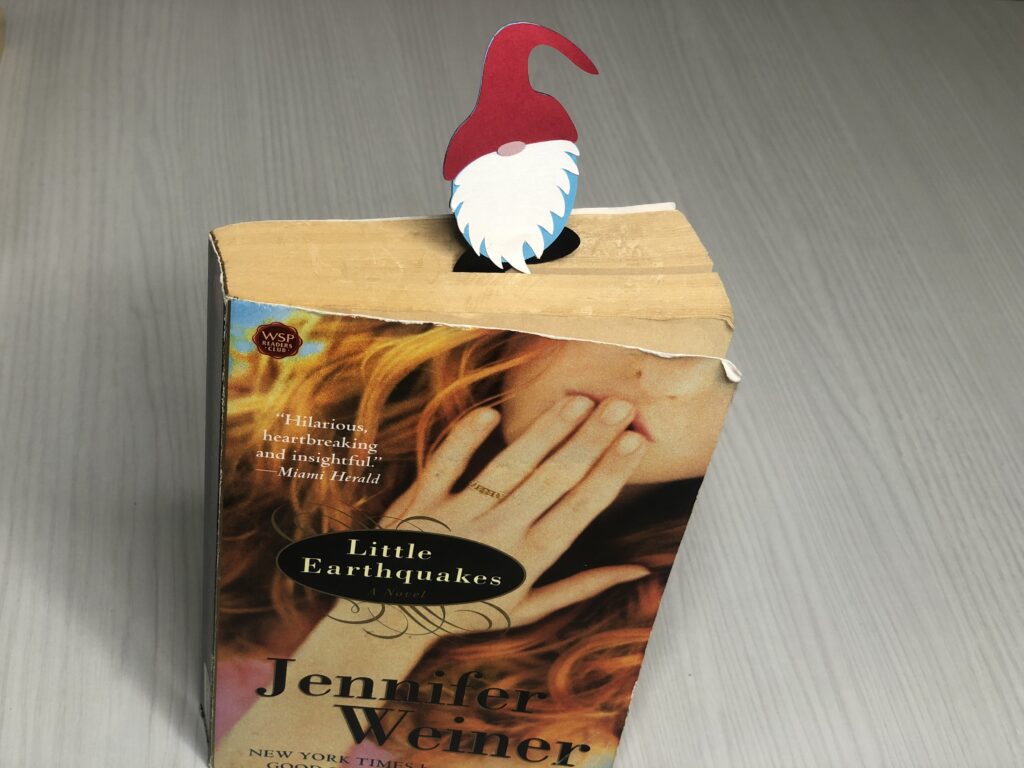
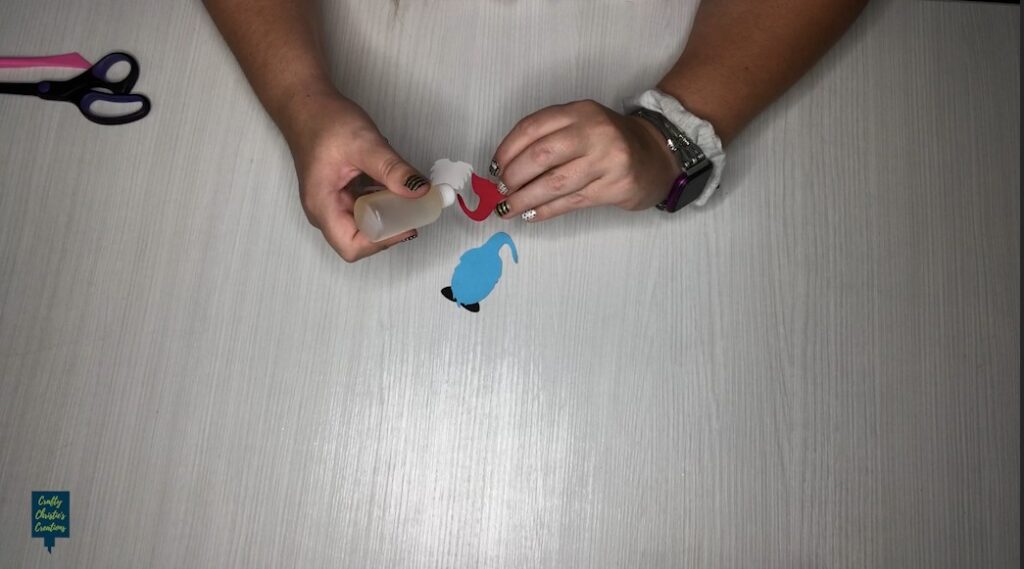
Step 1: Make Your Decoration
I’m making a little gnome to sit on my paperclip. You can use any shape or creature you want. I layered the gnome and made sure he was good and sturdy. If you are cutting a shape, cut 2-3 copies and glue them together to make it more durable.
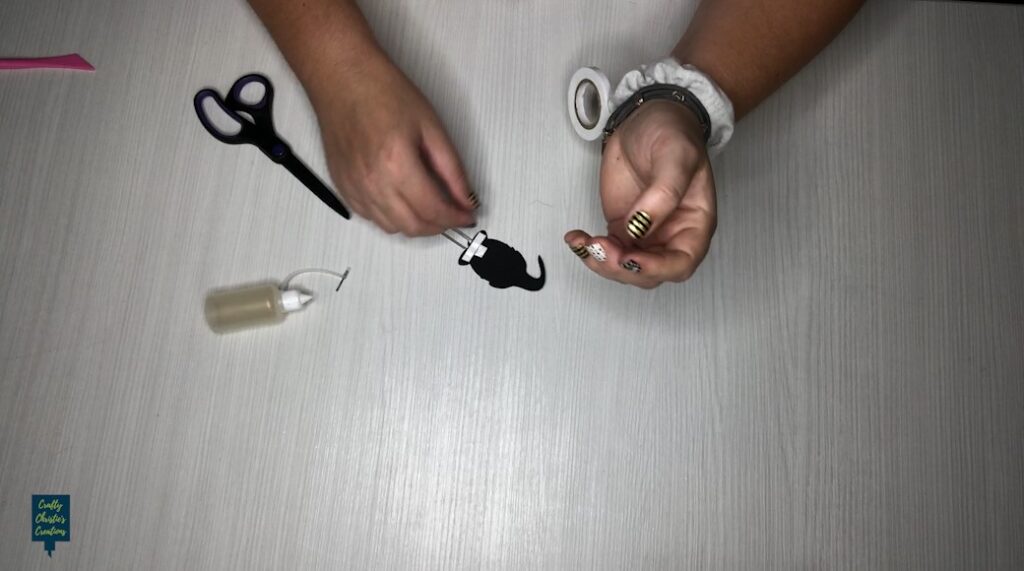
Step 2: Add the Paperclip
Attach the shape just above where the turns in the paperclip meet. Ideally, use hot glue, I didn’t have any on hand so I used foam tape and left the release paper on one side.
Step 3: Put Your Paperclip Bookmark to Work
Try out your paperclip bookmark. The shape/creature will stand above the page so keep that in mind when you size it. It makes it very easy to find your place in the book.
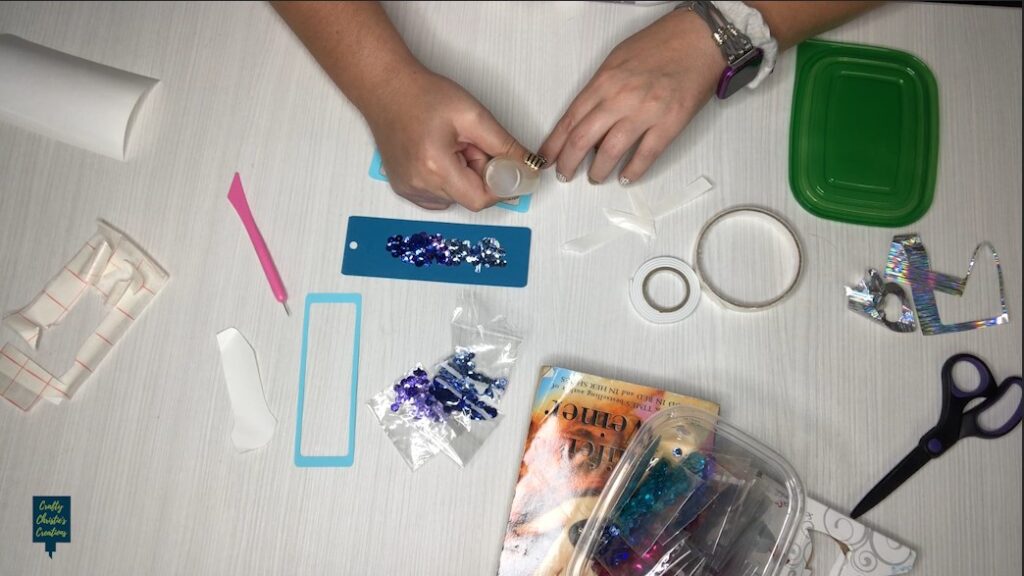
Bookmark #4 – Shaker Bookmark
Supplies:
Cardstock
Glue
Score Tape
Clear Acetate
Sequins
Vinyl (optional)
Transfer Tape (optional)
Rock n Doll Script Font
Ribbon or Twine
Cutting Machine
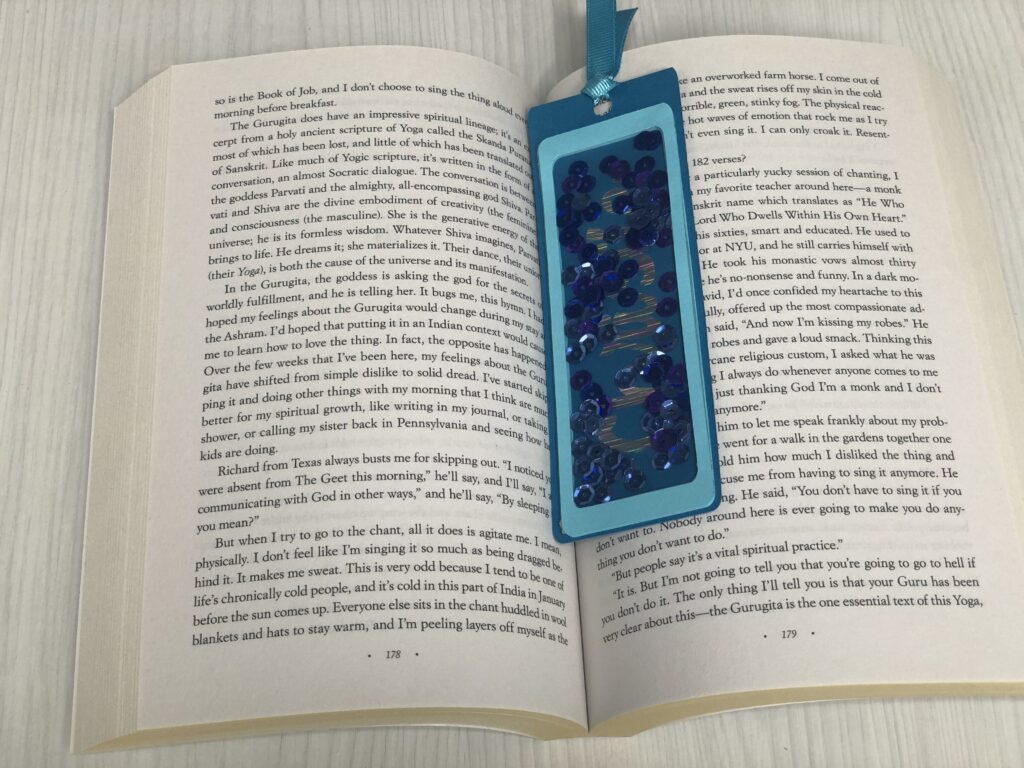
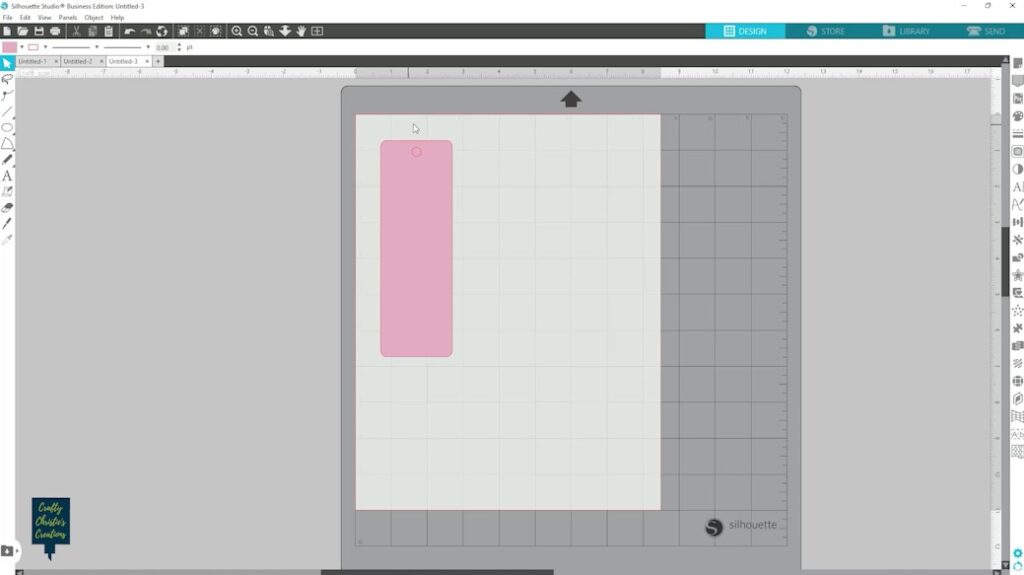
Step 1: Designing the Bookmark
Draw the base shape of your bookmark. Traditionally, bookmarks are about two inches wide and six inches tall. Give it rounded edges for a softer look. Convert the shape to a path and adjust its size as needed. Fill the bookmark shape with your chosen color.

Step 2: Adding a Hole
Create a hole in the center of your bookmark. Use the Shift and ALT keys to make a perfect circle. Align the hole with the bookmark’s top center.
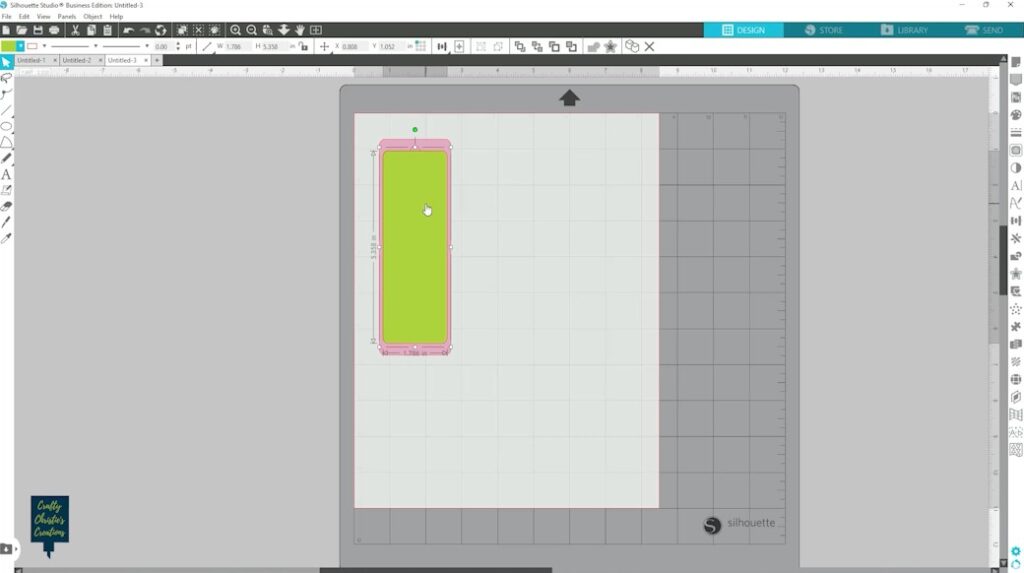
Step 3: Preparing the Shaker Window
Duplicate the bookmark shape and make it slightly smaller. For the shaker window, create another duplicate of the bookmark shape, and this time, make it even smaller.
Align all three shapes (the larger base, the smaller layer, and the shaker window) to ensure they fit perfectly.
Step 4: Creating Filler Walls
Duplicate the 2 smaller rectangles and use the “Subtract” function to make the walls for the shaker window. Make several copies of this wall. Make 1 extra copy to be the front cover.
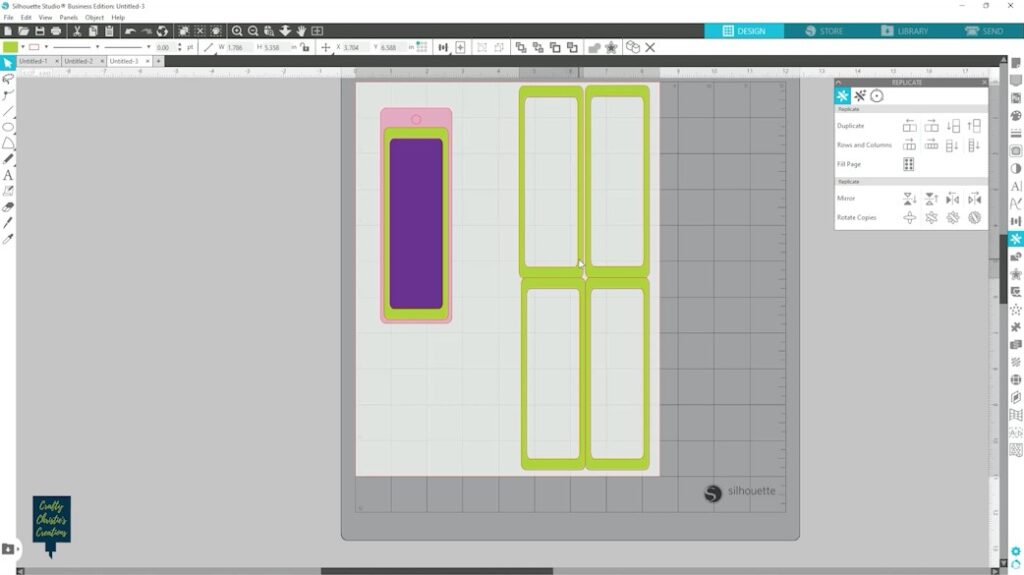
Step 5: Preparing the Acetate Layer
The larger rectangle serves as the clear acetate cover for the shaker. If you don’t have acetate, you can use a laminator sheet or vellum to make the window.
Step 6: Personalizing Your Bookmark (Optional)
If you want to add a personal touch, consider using vinyl to create a design or your name to go on the inside of the shaker window.
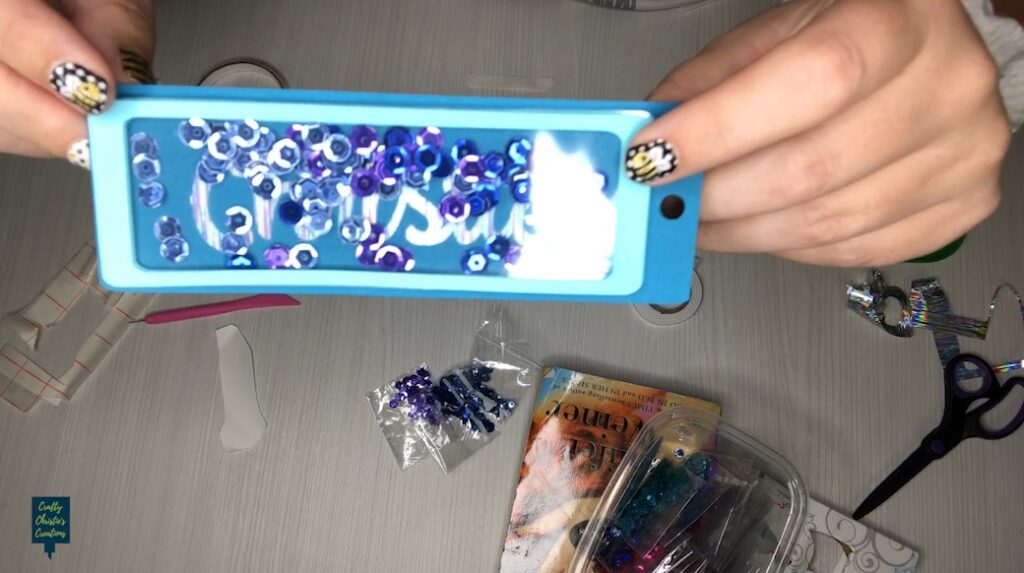
Step 7: Assembling the Shaker Bookmark
Begin by layering the shaker walls. Then add the clear acetate on top using score tape. This will encase your sequins or embellishments. Add your chosen embellishments and vinyl to the bookmark base within the shaker window area. Be creative with your choices and colors. Securely attach the shaker walls on top of the embellishments, creating a contained shaker section. Apply adhesive to the front of the acetate and add the cover to hide all the glue.
Step 8: Add Ribbon or Twine
Thread your chosen ribbon through the hole and tie a knot or bow. This part can stick out of the book to show your place.
Step 9: Enjoy Your Shaker Bookmark
Your shaker bookmark is now complete! Gently shake it to watch the sequins or embellishments move inside. Use it to mark your place in your favorite books and enjoy the whimsy it adds to your reading experience.
Bookmark #5 – Faux Leather Magnetic Bookmark
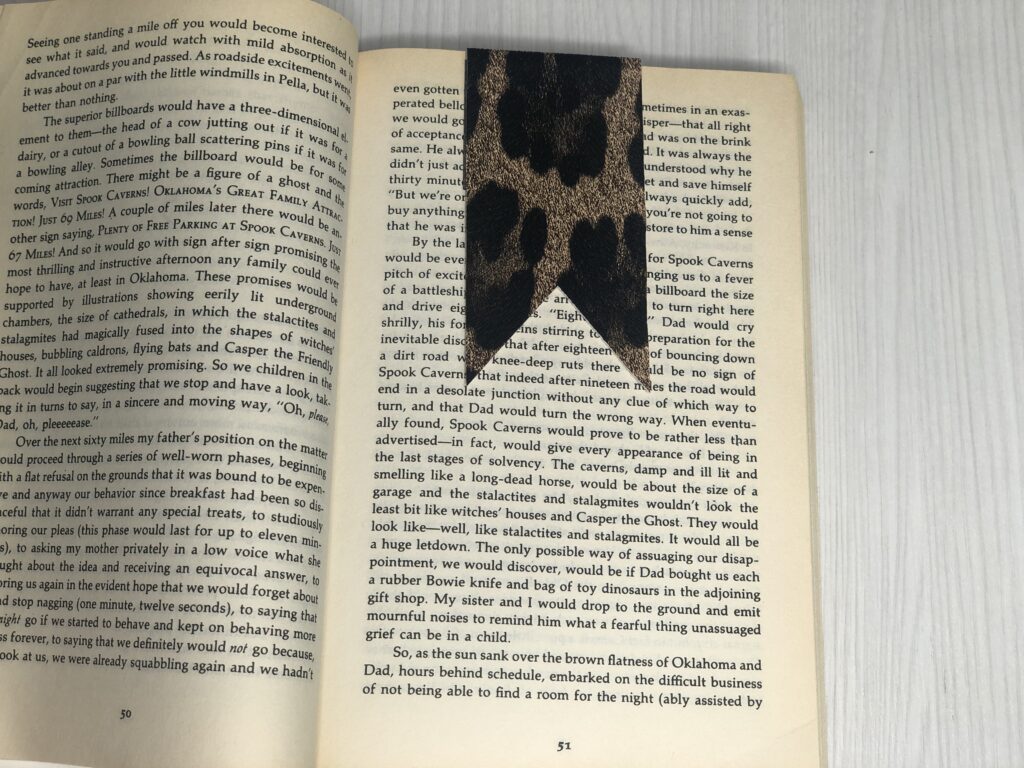
Supplies:
Faux leather
Magnetic sheets with adhesive backing
Cutting Machine
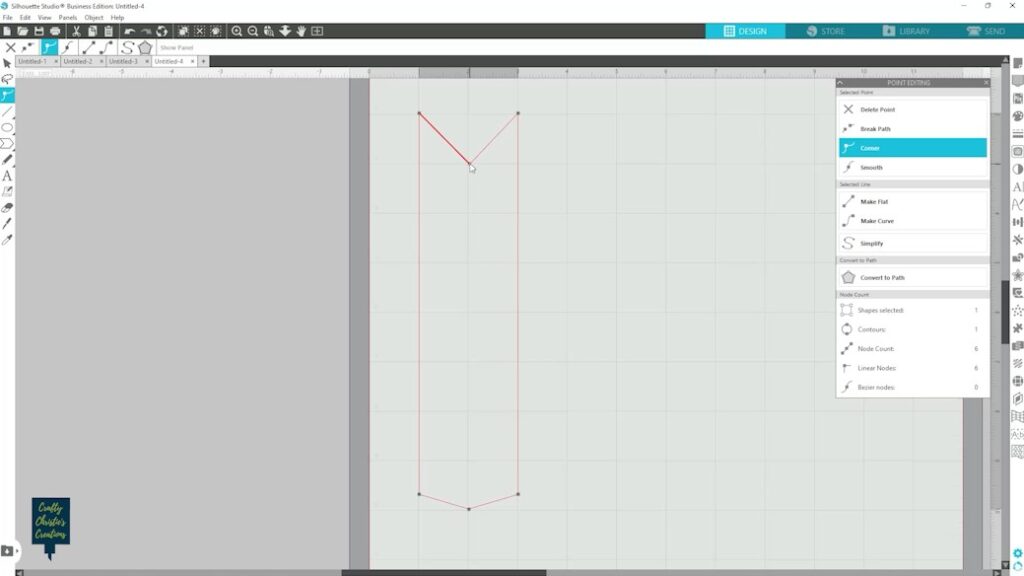
Step 1: Designing the Bookmark
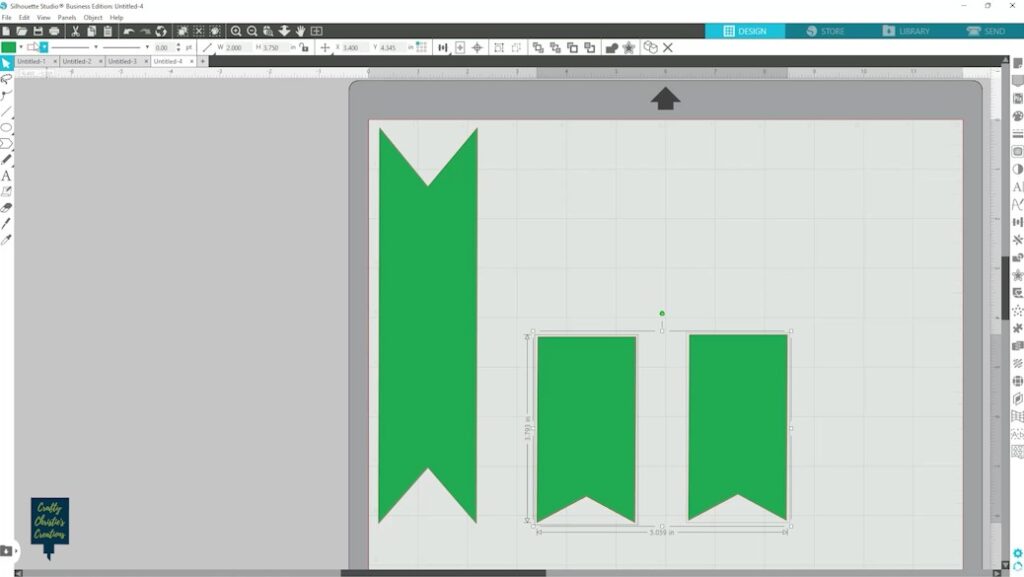
Create the overall shape of your bookmark. In this example, I’ve chosen a flag shape. Use the flexishapes and use point editing to adjust the flag ends. Fix the dimensions to approximately 2 inches in width and 8 inches in height, which will yield a 4-inch tall bookmark when folded.
Step 2: Preparing the Magnetic Strip
Duplicate the bookmark shape to create the magnetic strip. Remove one of the pointed ends to make it easier to work with. Resize the strip to be approximately 3.75 inches in height, leaving a bit of room at the top for folding. Check that the flag portion still matches the original bookmark. Cut two identical magnetic strips.
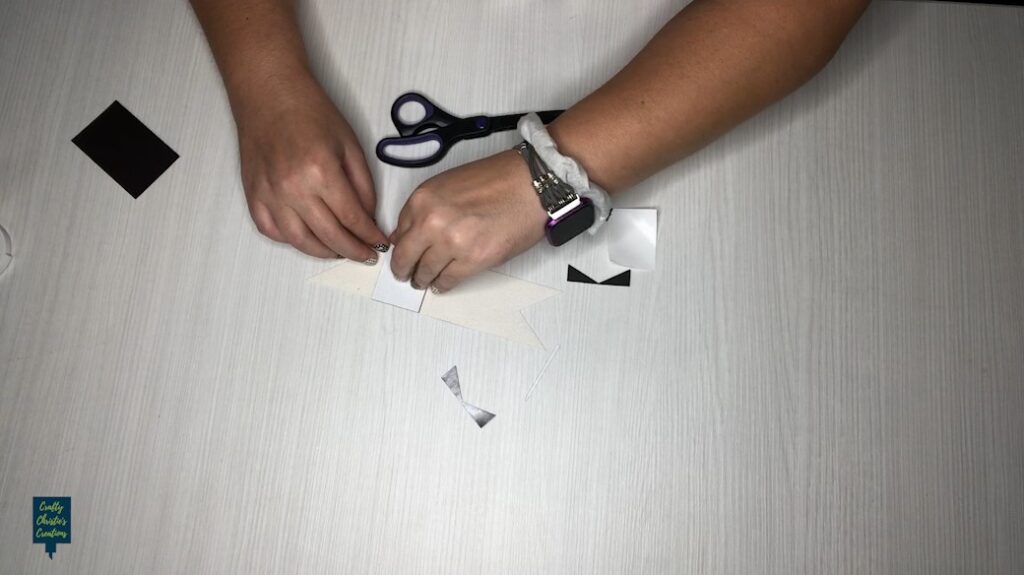
Step 3: Assembling the Bookmark
Cut the bookmark shape out of your chosen faux leather material. This will be the outer layer of your bookmark. You can further customize it with heat transfer vinyl or decorative elements if desired. Fold the faux leather in half to identify the middle. Peel the adhesive backing off one of the magnetic strips. Place the magnetic strip inside the faux leather bookmark, aligning the tails of the flag. There should be some space left at the top without a magnet. Lay the other magnet on top, remove the backing, and fold over the leather.
Step 4: Using Your Magnetic Bookmark
Your magnetic bookmark is now complete! To use it, simply open your book and place it over the page you want to mark. The magnetic strips will hold the bookmark securely in place, ensuring you never lose your page again.
That’s it, my crafty friends! These five bookmarks to make with Silhouette offer a creative way to enhance your reading experience and make wonderful gifts, and craft fair items for fellow book lovers. So, grab your crafting supplies and let your imagination run wild as you craft these unique bookmarks. Happy crafting, and happy reading!
Check out the video below for more information on making these bookmarks. Here are 2 more tutorials you might find helpful when creating your bookmarks.
Learn How to Type on a Curve
Learn How to Make a Stencil Font


