
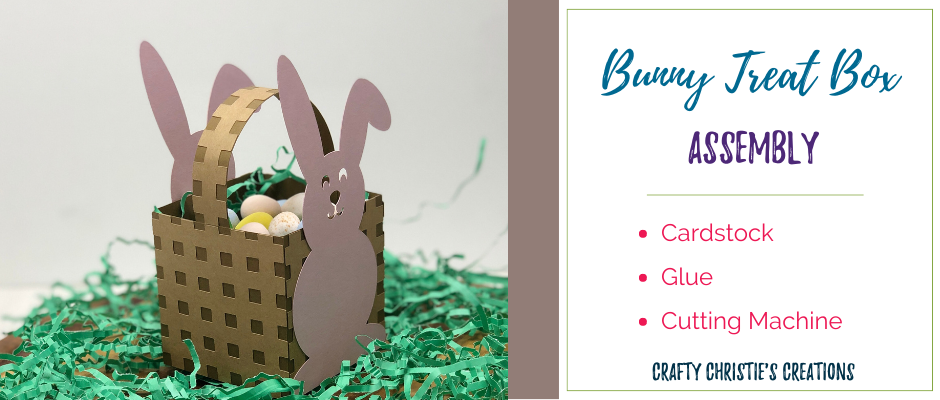
Looking for a different type of Easter basket, this little bunny treat box might be it!
Treat Box Information:
The box is 3 inches deep x 3 inches wide x 3 inches tall. It takes 3 sheets of 8.5 x 11 inch cardstock to cut all the pieces. Assembly time is about 20 minutes.
Supplies:
Step 1: Cut the Design
Once you’ve unzipped the file, there are 3 different svg files: the bunny, the box base, and the box layers. Open your cutting machine software and navigate to where you saved the treat box files and pull them into the software. Cut and score all the pieces included, this does take a bit of time to cut out the light brown box layers since it cuts all the tiny squares. Remember all the score lines are represented as white lines.
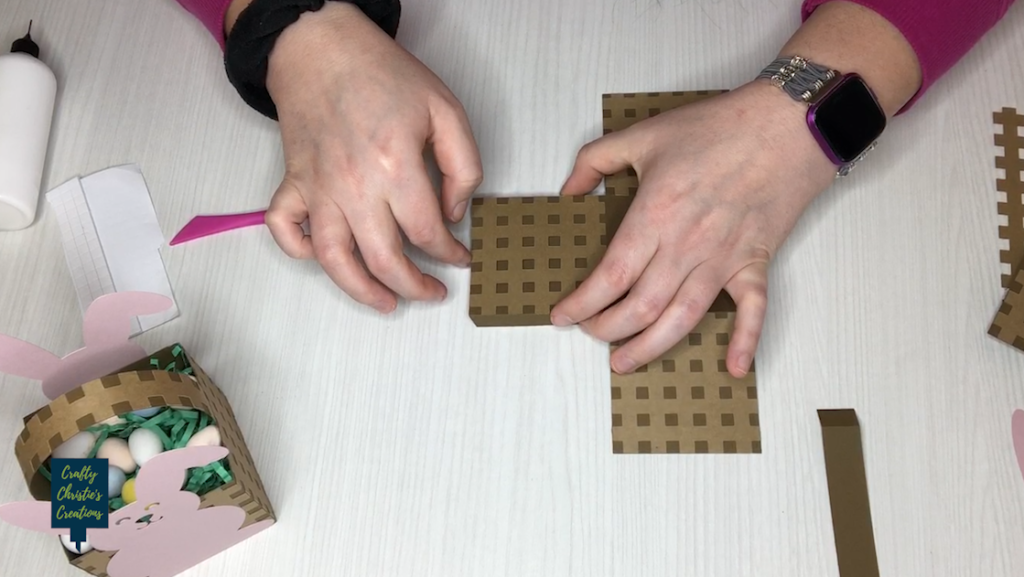
Step 2: Layer the Box
Fold on all the scorelines. Place the light brown squares on the box base. They will match up flush on all 4 sides. The middle square on the box base is the bottom so it does not need any layers. Do the same for the handle.
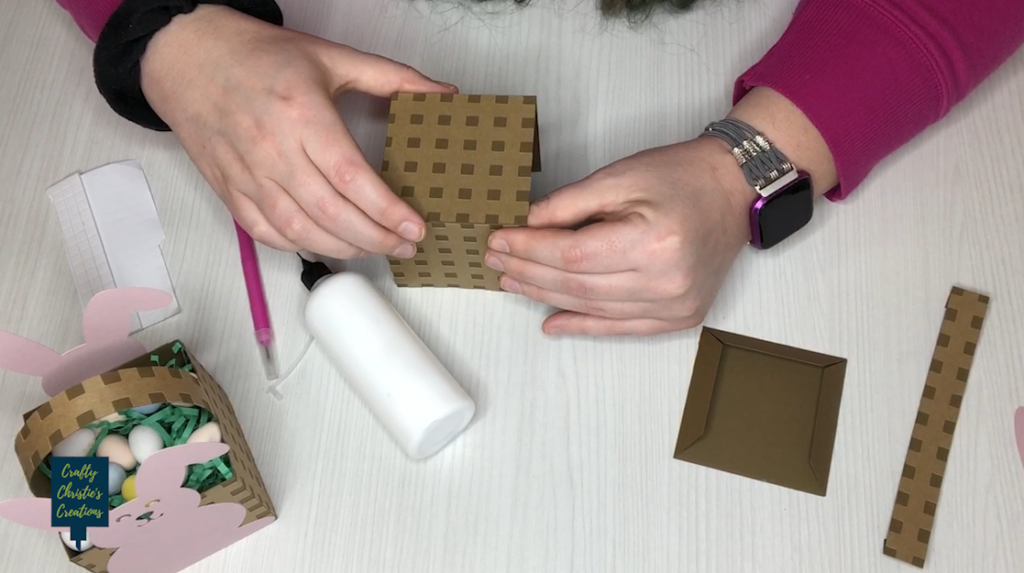
Step 3: Assemble the Box
Place glue on the side tabs and adhere each tab to the inside of the box. Be sure all the edges are flush and there are no gaps at the corners. Add the lone square with tabs to the missing side. I like to add glue to all 3 tabs at once and slide this one into place. You’ll notice the weave pattern of the light brown cardstock will line up on all sides.
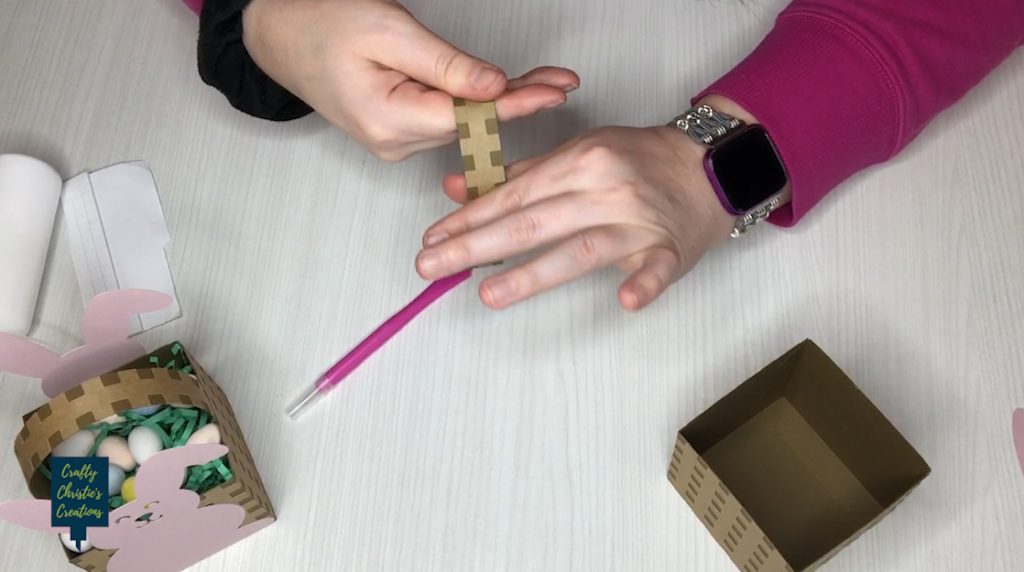
Train the handle to curve by running it through your fingers a few times. Once you have a decent curve, add the handle to the top matching its weave to the middle line on the box. The scoreline on the handle should be flush with the top of the box.
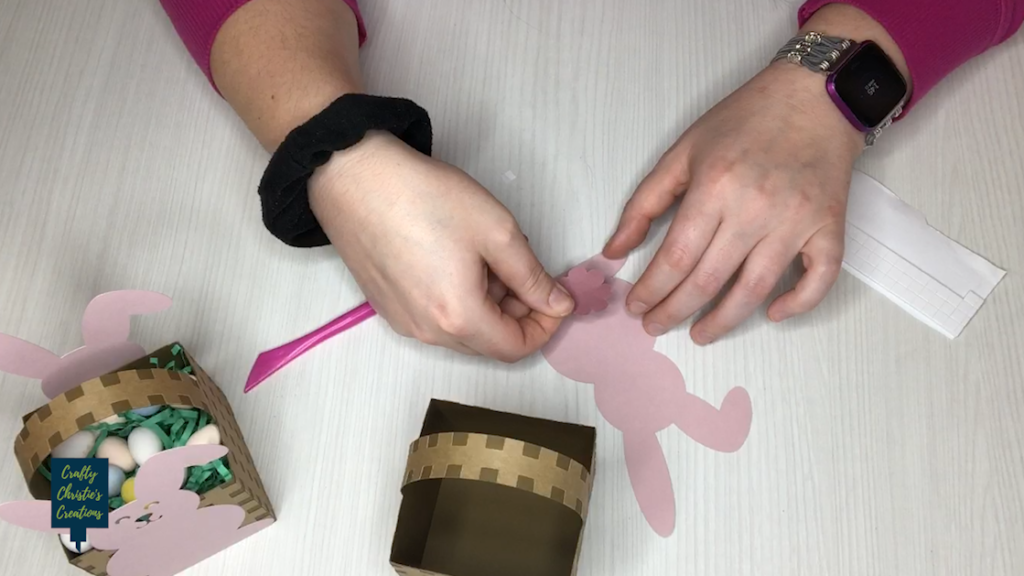
Step 4: Add the Bunny
Take both parts of the bunny and put them together so the ears match up. Flip over the bunny parts and add the tail on the back. Now take the front bunny and glue or foam square it to the front of the box. The feet will line up flush along the bottom and the sides. Do the same on the back of the box with the tail end.
Step 5: Fill the Box with Treats
I like adding grass to the box for decoration. Fill the box with treats like chocolates, Easter eggs, or mini alcohols for the adults. These boxes fit a lot of small goodies so go wild!
Check out the video below for further instructions on the assembly of the bunny treat box.


