
When was the last time you sat down and created a scrapbook page? I know for me, it has been at least 5 years ago! While I am always taking photos, I never seem to find time to print them anymore. This is why I find creating digital pages so much easier. I can use the pictures that I’ve uploaded to my computer and give purpose to all those hoarded svg files. If you’re not good at making your own layout, there are tons of ideas on Pinterest to get you started. Follow along and learn how to create a digital scrapbook page in Silhouette Studio.
Supplies:
Back to School Bundle SVG
Planner Sticker Bundle SVG
School-Themed Digital Papers SVG
Step 1: The Page Background
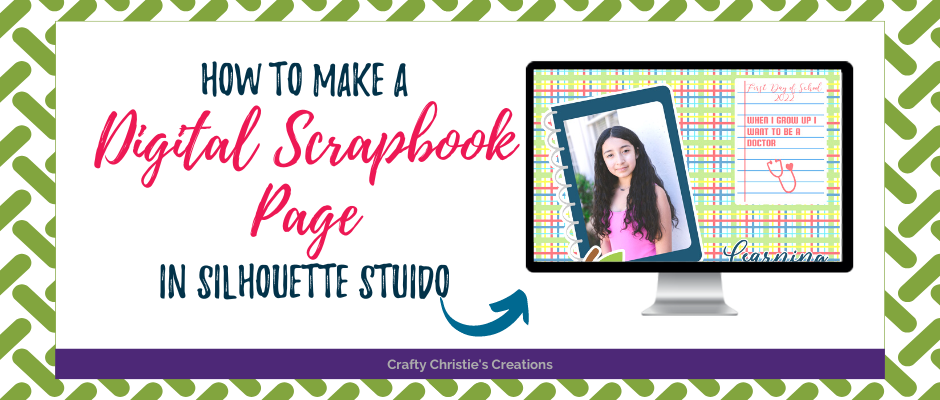
Choose a digital paper that works for your page design. I’m doing a “First Day of School” page so I chose this plaid background from my school-themed digital papers. Because it is such a busy background, I turned down the transparency to mute the colors a bit.

Step 2: Add an offset to the graphics
Adding a white-filled offset to the graphics will help them stand out against that busy background. I used a 0.03 offset and turned off the red line color as well. Group the offset with the graphic so you can move them around together.

Step 3: Scrapbook Page Layout
Now that all your graphics have a white border, it is time to arrange everything on the background. The nice part about using SVG files is that you can easily resize the graphics to fit your needs. I made a copy of the blue notebook and made it a bit smaller to represent where my photo will go. I can add the photo at any time.
Step 4: Adding Text
I always leave places on my layout to add a few sentences to go along with the photo. For school-themed pages, I like keeping track of favorite subjects, activities, and what they want to be when they grow up. It is always fun to go back and see how much their favorites have changed or stayed the same. I did my writing on the paper with the Bali Sunrise font.

Step 5: The finished Product
Depending on the size of your page, there are a few options on how to use it. If you’re making 12×12 pages and can’t print them at home you can save your file as a png and send it to a print shop or online places like shutterfly.com. They make 12×12 books and also prints.
You also have the option to print and cut all the graphics to use on a traditional scrapbook page.
For another option, they make smaller-sized scrapbooks like 6×6. Then you could print the pages at home using the print and cut method and then add the page to your book.
If you really enjoy keeping things digital, you can always create your own folder that you share via email or social media with friends and family.
With so many options, it is hard to pick one. You can also use this technique to make your photo Christmas cards.
Check out the video below for more details on how I made this “First Day of School 2022” scrapbook page.


