

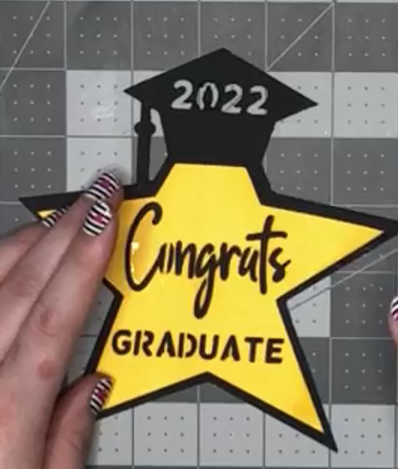
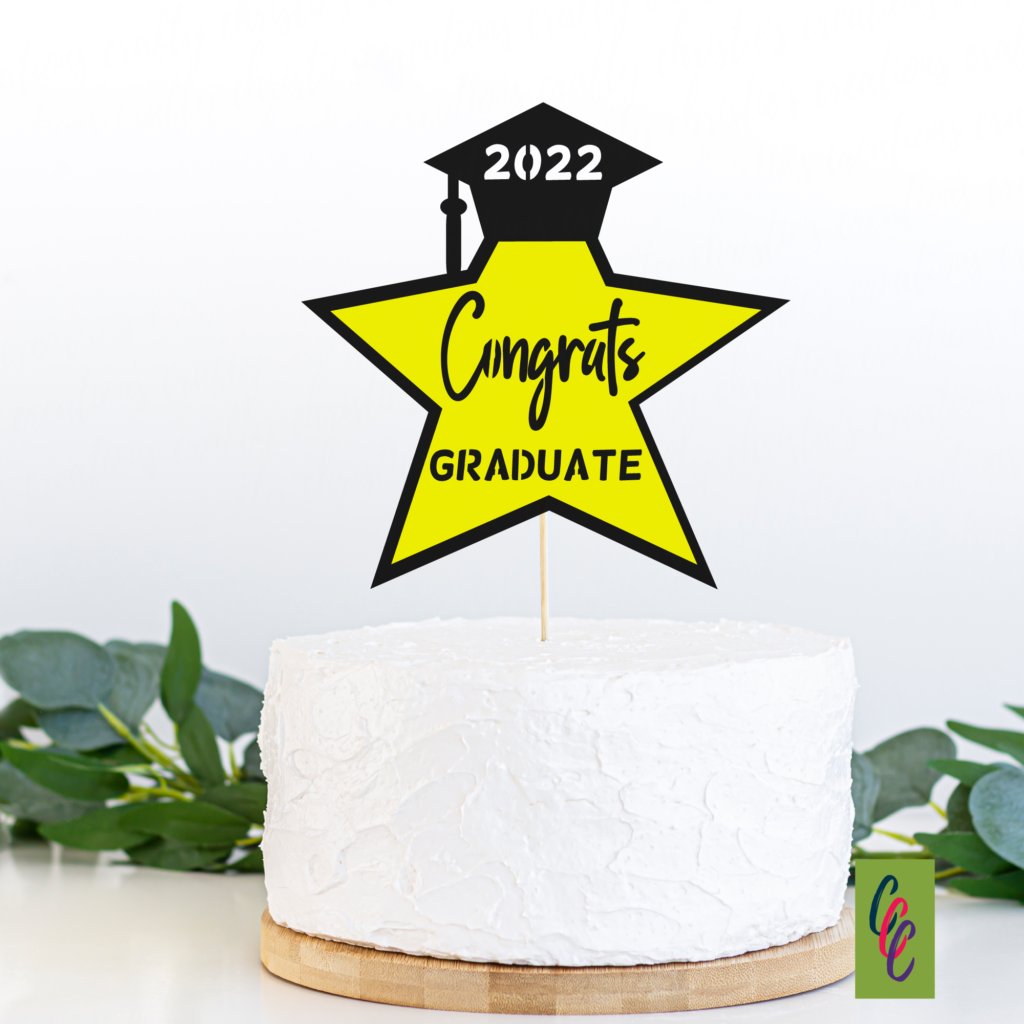
Graduation season is in full bloom and what better way to celebrate than with a custom cake topper. I’ve seen a lot of really elaborate ones with 4 or 5 layers, but I like to keep it simple. Follow along as I teach you how to make a 2 layered cake topper for your graduate using your Silhouette cutting machine.
Supplies:
Hot Glue
Cake Sticks
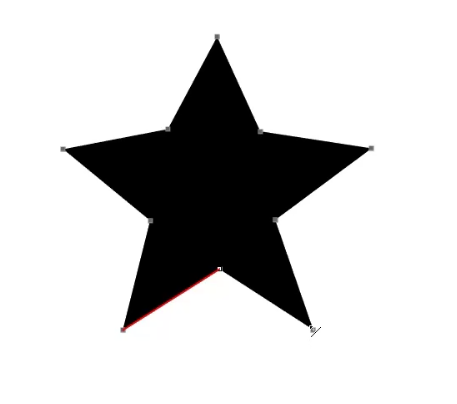
Step 1: Use Flexishapes to design the stars
Use the flexishapes and make a star about 6 inches wide. Then hit “convert to path” so the star is no longer a flexishape. Double-tap on the star to get the point editing tools. Move around the points to make the shape more start-like. This step is optional.
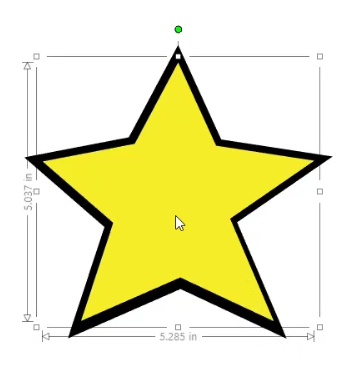
Make a copy of that star, then shrink it to make the front layer. Color the larger star black and the smaller star yellow.
Step 2: Write the text
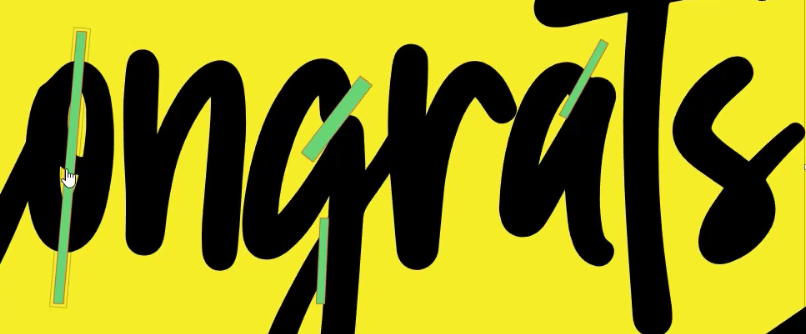
Type out “Congrats” and “Graduate” and choose the fonts you want to use. These will end up being cut out of the yellow layer so pick thicker fonts or add line colors to thicken the fonts. I used South Australia font for “Congrats” and Helsinki font for “Graduate.”
Add a 1.5 pt line color to Congrats since the font is so thin. You want to be able to cut the word out easily.
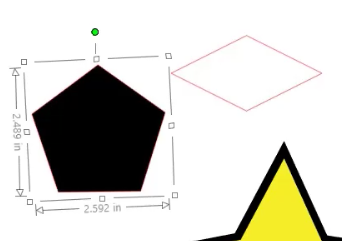
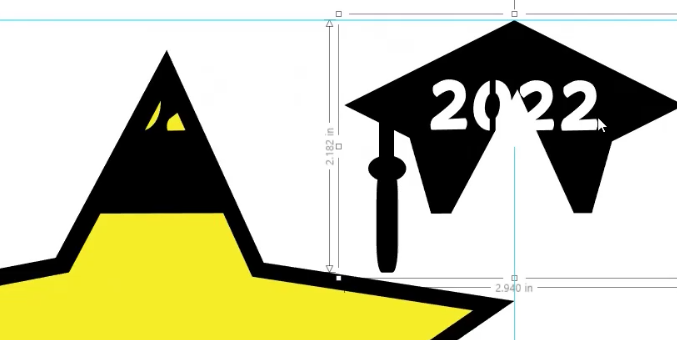
Step 3: create the graduation cap
Use the flexishapes again to make a diamond and a 5-point hexagon shape. Convert each shape to path and then line them up and weld the shapes together. Double-tap the hexagon and fix the bottom to fan out a bit more. Weld the diamond to the top of the hexagon to make the graduation cap.
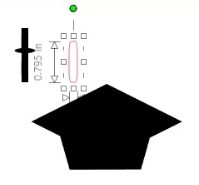
Step 4: Make the tassel
Use the rectangle tool to make a long thin rectangle. About midway down add an oval shape across the rectangle. Under the oval add a curved rectangle to the bottom. When you like the look of these pieces weld them together and then weld them to the cap.
Line up the tip of the graduation cap with the tip of the star. Size the cap so it sits on the top of the star.
Step 5: Cut the shapes
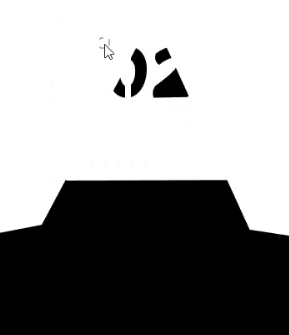
To personalize the cake topper, add the year to the graduation cap. Now that we can see the black and yellow star through the numbers we have to fix the shapes so this won’t happen. Duplicate your graduation cap to the left so we have a spare copy.
Now select the cap and the yellow star and hit divide on the modify panel. This will cut out all the yellow and black pieces away from each other. Delete the yellow pieces and the rest of the cap leaving a flat-topped yellow star.
Select the spare graduation cap and replicate it to the right. This will place the cap back in the correct spot. This time select the cap and the black star and hit divide. Delete all the black pieces leaving a flat-topped black star.
Go back to the spare graduation cap and replicate it to the right one more time. Select that cap and the black star and click “weld” on the modify panel. This will combine the 2 shapes into 1 shape.

Step 6: Create the Cutouts
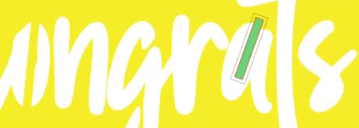
Make a thin rectangle to make the text stencil fonts. We need to do this since the words will be cut out of the yellow star shape. Place the thin rectangle over all the “A”s, “D”s, and any other letter that has closed areas. Then subtract the rectangles from the letters. Check out this tutorial on making stencil fonts if you’d like a more in-depth look at this process.
Once the stencil fonts are created, subtract the text from the yellow star. If any of the gaps are too large you can always go back in with more rectangles and weld those into the openings.
Step 7: Put the topper together
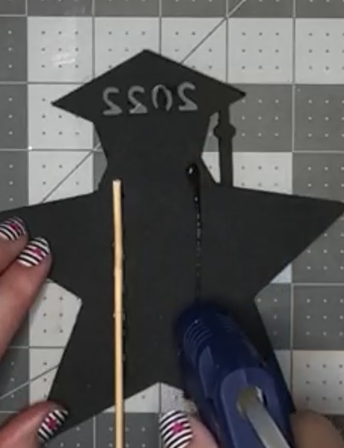
Cut out the 2 layers in cardstock colors of your choosing. I did black and yellow. Use glue or foam tape to adhere the layers together. There should be an even border of black around the yellow star.
On the back of the black layer use hot glue to attach the cake sticks. I had some wood skewers laying around that I cut down to size. They do also make cake sticks specifically for toppers as well. This topper is small enough you could use just one stick but I like the look of 2.
Step 8: Put your topper on display
Push the sticks down into the cake making sure they are nice and level. Take a few photos of your creation before everyone dives in to enjoy it!
Recap of how we made our graduation cake topper
Cake toppers can be pretty simple to make. Not only are these fun projects but creating them from scratch is a great way to test your knowledge of the modify panel. We used subtract, weld, and divide to achieve this design. Using a combination of flexishapes, rectangles, ovals, and fonts we were able to create the star and graduation cap with our lovely message. I have full confidence you can design your own cake topper by following these steps.
Check out the video below for a more in-depth look at all the steps.


