Design Layered Mandalas

Please note: this post may contain affiliate links to products I use. When you purchase items from these links, I make a small commission that helps fund craft projects I share with you. This does NOT cost you anything extra, but it is a great way to show your appreciation for Crafty Christie’s Creations.

How To Design Layered Mandalas in Silhouette Studio

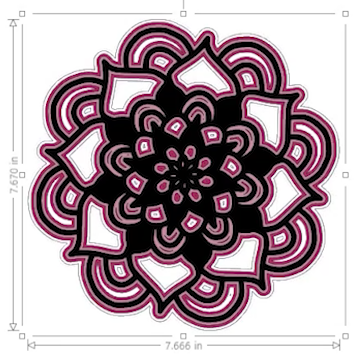
If you like mandalas you’re going to LOVE learning how to design layered mandalas in Silhouette Studio. I know there are some amazing layered mandalas out there that have a new design for each layer. Don’t get your hopes up too much, today I’m showing you how to make a basic layered mandala using the offset tool.
 
I’m a bit fan of the offset tool, I use it all the time for different projects. I’m showing you my secret with this tool to make those lovely mandalas. To start off, create your own mandala or purchase one online.
 
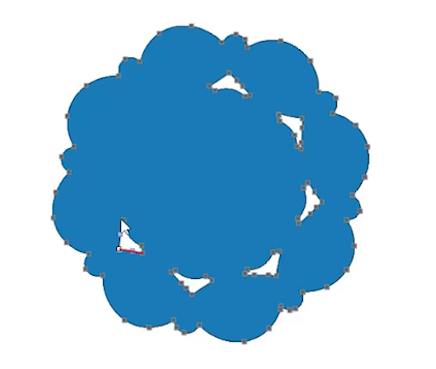
Center the design to your page and open the offset panel. Click on the offset and choose the distance you want to use. I like to use the 0.065 increment.
 
offset panel to design layered mandalas
Add color to the offset for better visualization. Then with the offset selected, make another offset of that at the same increment. Repeat this process to build up the layers that you want.
adding color to the layered mandala
Now add one last layer and use point editing to remove any gaps in the design. I like having this be a solid cutout of the entire shape.
use point editing to remove unwanted parts of the layer
For the complete step by step of this process check out the video below.
Crafty Christie

Crafty Christie

Silhouette Tutorialsist and SVG Designer

Hi! I'm Christie!

I am passionate about helping other crafters unlock their creativity and take their crafting skills to the next level.

Let's Connect!

Blog Categories

Design Faster with Silhouette Keyboard Shortcuts