

Have you ever made a larger than mat-sized project? Deciding where to make all the cuts for the pieces to fit together cleanly is a huge hassle. Luckily, Silhouette Studio business edition can do the work for you. Follow along and learn how to use the tiling feature in Silhouette Studio.
Step 1: Choose Your Design
I’m using a mandala I made in procreate. I imported the png and traced it to get a cuttable design.
Step 2: Use the Tiling Panel
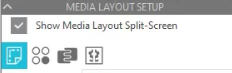
You need business edition of studio for access to the tiling tool. Click on the media layout setup panel. Then check the media layout split screen. Without checking this box, you won’t be able to proceed to the tiling screen.
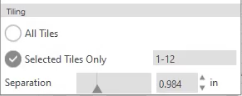
Select the tiling button and the work is done!
Step 3: Cut the Project
You can cut them all in order or choose which one you want to cut first. The tiling feature’s beauty is that it adds all the straight lines so each tile fits seamlessly with the next.
For more details on tiling check out the video below.
The video below shows how I put it all together.


