I’m so excited to start working with the Silhouette Cameo 5. It came in the mail this week and it is time to get it up and running! Follow along as I show you the Silhouette Cameo 5 unboxing and setup process. After this, you’ll be ready to make your first cut with your new machine.
Step 1: Silhouette Cameo 5 Unboxing
Let’s get that new machine out of the box! Unwrap all the parts and carefully remove all the tape and foam pieces wrapped around the cameo machine. Be gentle when sliding the carriage housing to the side to pull the foam from behind it. You don’t want to ruin something before you’ve even had a chance to play!

Step 2: Silhouette Software Setup
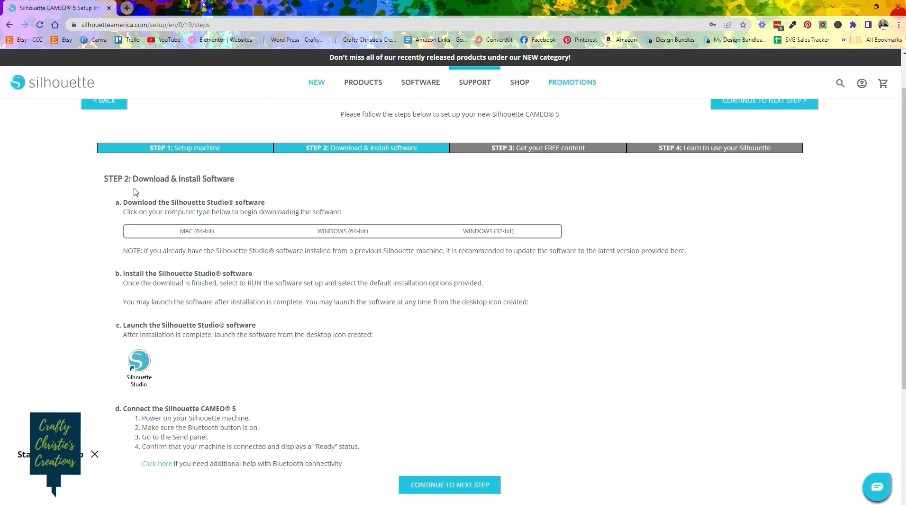
If you live in the United States, go to www.silhouetteamerica.com/setup to register your machine and get the latest software version. You’ll find the serial number on the back of your Cameo. You need to download version 4.5.735 (or higher if you’re doing this later) so Silhouette Studio is compatible with your Cameo 5 and its features.
If you have Silhouette Studio already open, close it down before installing the latest version. My download removed the old version of the software then I was able to download and install the new version. Once it is installed go ahead and launch Silhouette Studio.
Step 3: Connecting The Silhouette Cameo 5 to Bluetooth
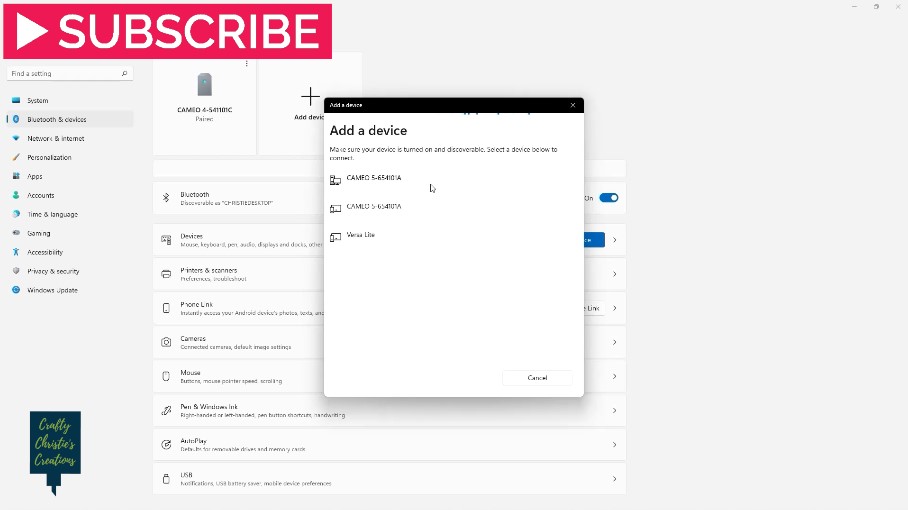
Power on your machine and touch the Bluetooth button to turn it blue. On your computer navigate to the Bluetooth settings and pair the Cameo 5 to your computer. Have your Cameo close to the computer to make pairing go smoothly.
Step 4: Updating The Firmware
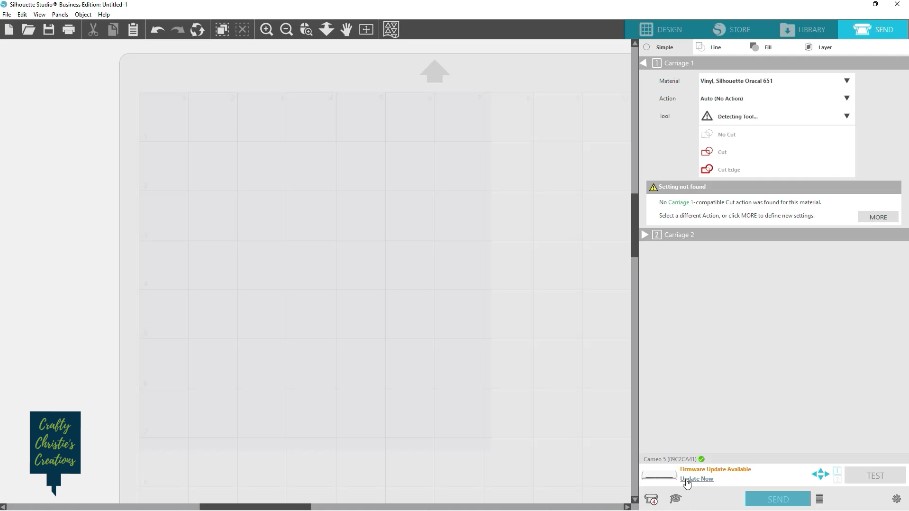
Now that you have your Cameo paired with the computer, launch Silhouette Studio and go to the Send Panel. Like the Cameo 4, the Cameo 5 will automatically update firmware in the send panel.
At the bottom of the Send Panel, connect to the Cameo 5. Keep the machine on and install the firmware. Once this is complete it will tell you to load material. That is the Silhouette Cameo 5 unboxing and setup process. Now your machine is ready to make the first cut!